Update 05/14/2020: I have a new post with a similar deep dive into the Mavic 2 Pro – The Mavic 2 Pro has the same size chip as the Phantom 4 Pro, 1″ and 20MP, but it requires different settings to reach optimal image quality for video and for stills.
—
From Grey to White – filmed on a Phantom 4 Pro+ in 2.7k mode.
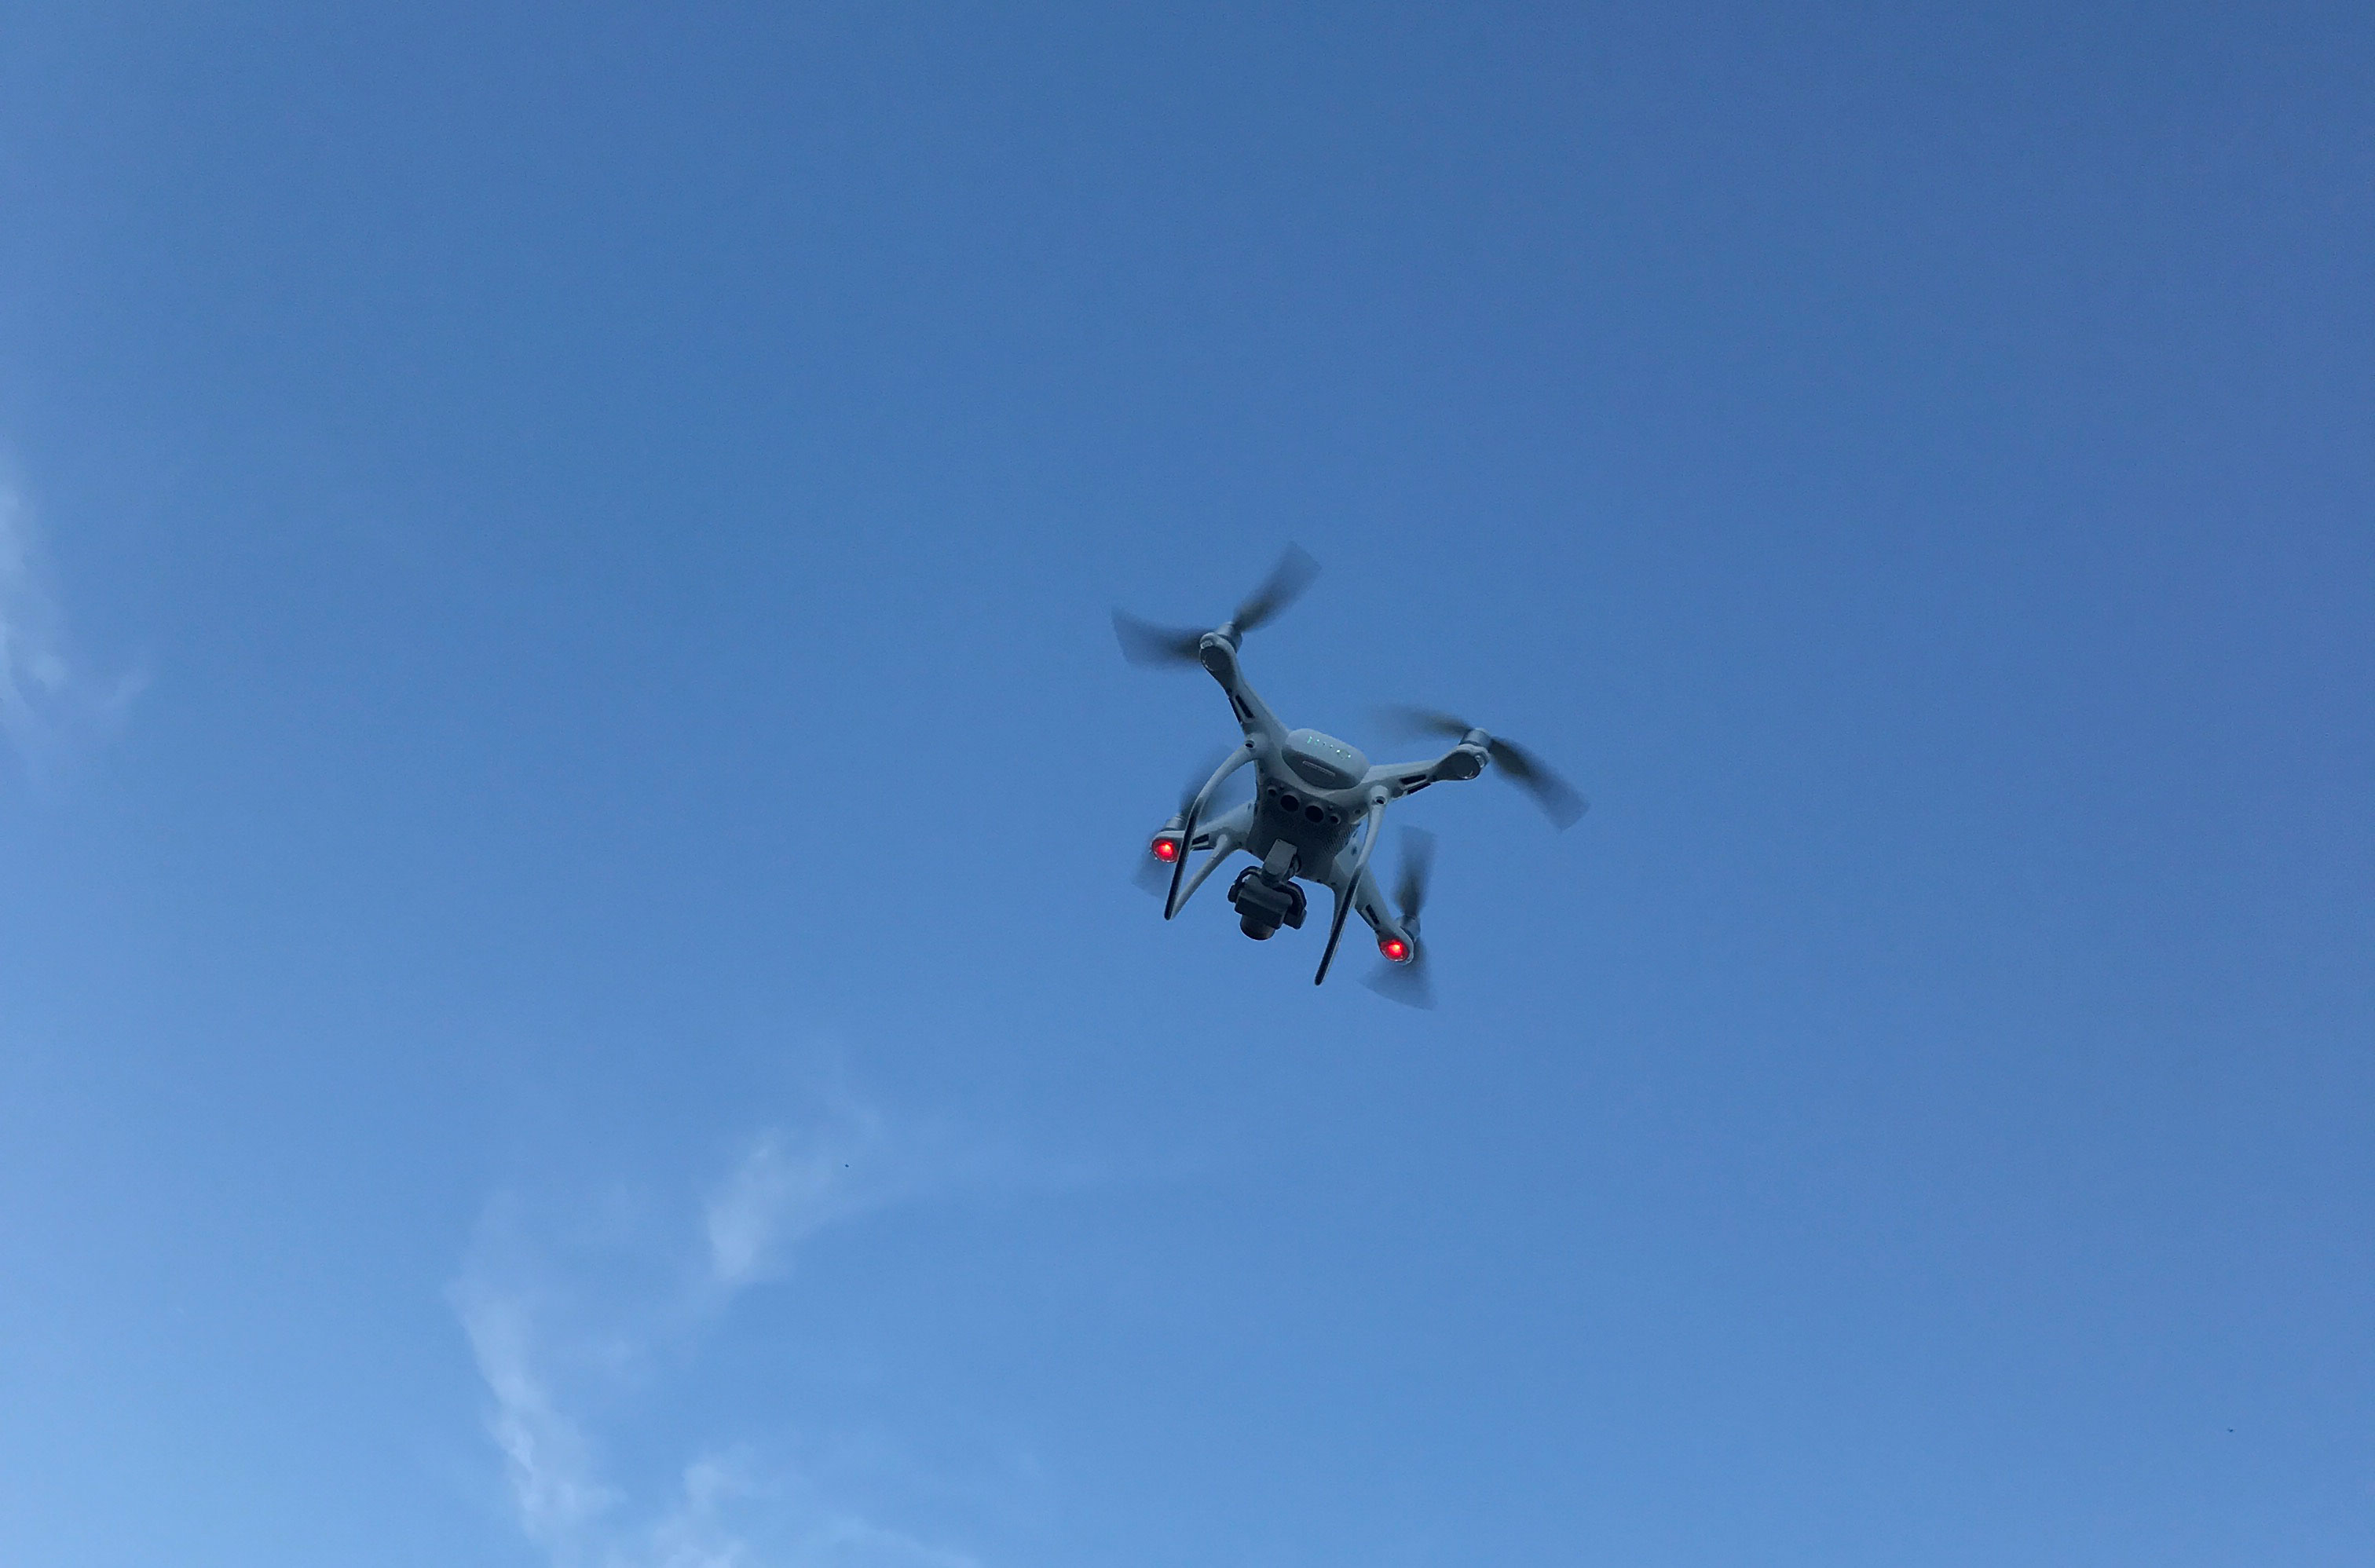
The DJI Phantom 4 Pro is DJI’s second iteration of its Phantom 4 drone. It was announced last November and its primary differences versus the 4 are a better camera, a larger imaging chip, a variable aperture lens, more obstacle avoidance sensors, a higher video bitrate, and increased resolution for still images.
There is also a second version of the drone, the Phantom 4 Pro+. The only difference between it and the Phantom 4 is that the 4 Pro+ has a built-in screen attached to its controller. The copter is the same. The image quality and the image settings are the same.
In terms of the imaging chip, the Phantom 4 Pro uses a 20 MP 1″ chip, which is about four times as large in area as the Phantom 4’s 12 MP ½.3″ chip. It is the same chip used in Sony’s RX100 Mark V fixed-lens compact camera. Going from the Phantom 4 to the Phantom 4 Pro is the equivalent of moving from flying with a cell phone camera to flying with a high end point and shoot camera. It’s a noticeable and significant difference.
I’m not going to go too into the weeds on specifications and differences versus other models, Phantom 4 Pro information is readily available online. You can also look at my past blog posts on the Phantom 4 if you need a point of comparison.
My intent in this post is to look at the Phantom 4 Pro’s image settings in order to determine which ones will provide the best image quality for still images and for video. The factors at play for both stills and video are ISO and aperture settings; and exclusively for video the resolution settings and the color mode.
On the stills side I’ll assume that if you want the best stills image quality you’ll shoot raw so in-camera jpegs are not addressed here.

ISO
In digital photography the higher the ISO is pushed beyond a chip’s base ISO, the less dynamic range a chip can capture and the less detail an image can show due to the increase in digital noise. Additionally, making a chip smaller in area and/or packing its photo sites more densely will have the same affect.
Put another way, the smaller the chip and the higher its megapixel count then the more quickly it will lose image quality as you stray from ideal photographing or filming conditions. A cell phone camera drops off in image quality very quickly while a digital full-frame 35mm camera has a much more gradual drop off.
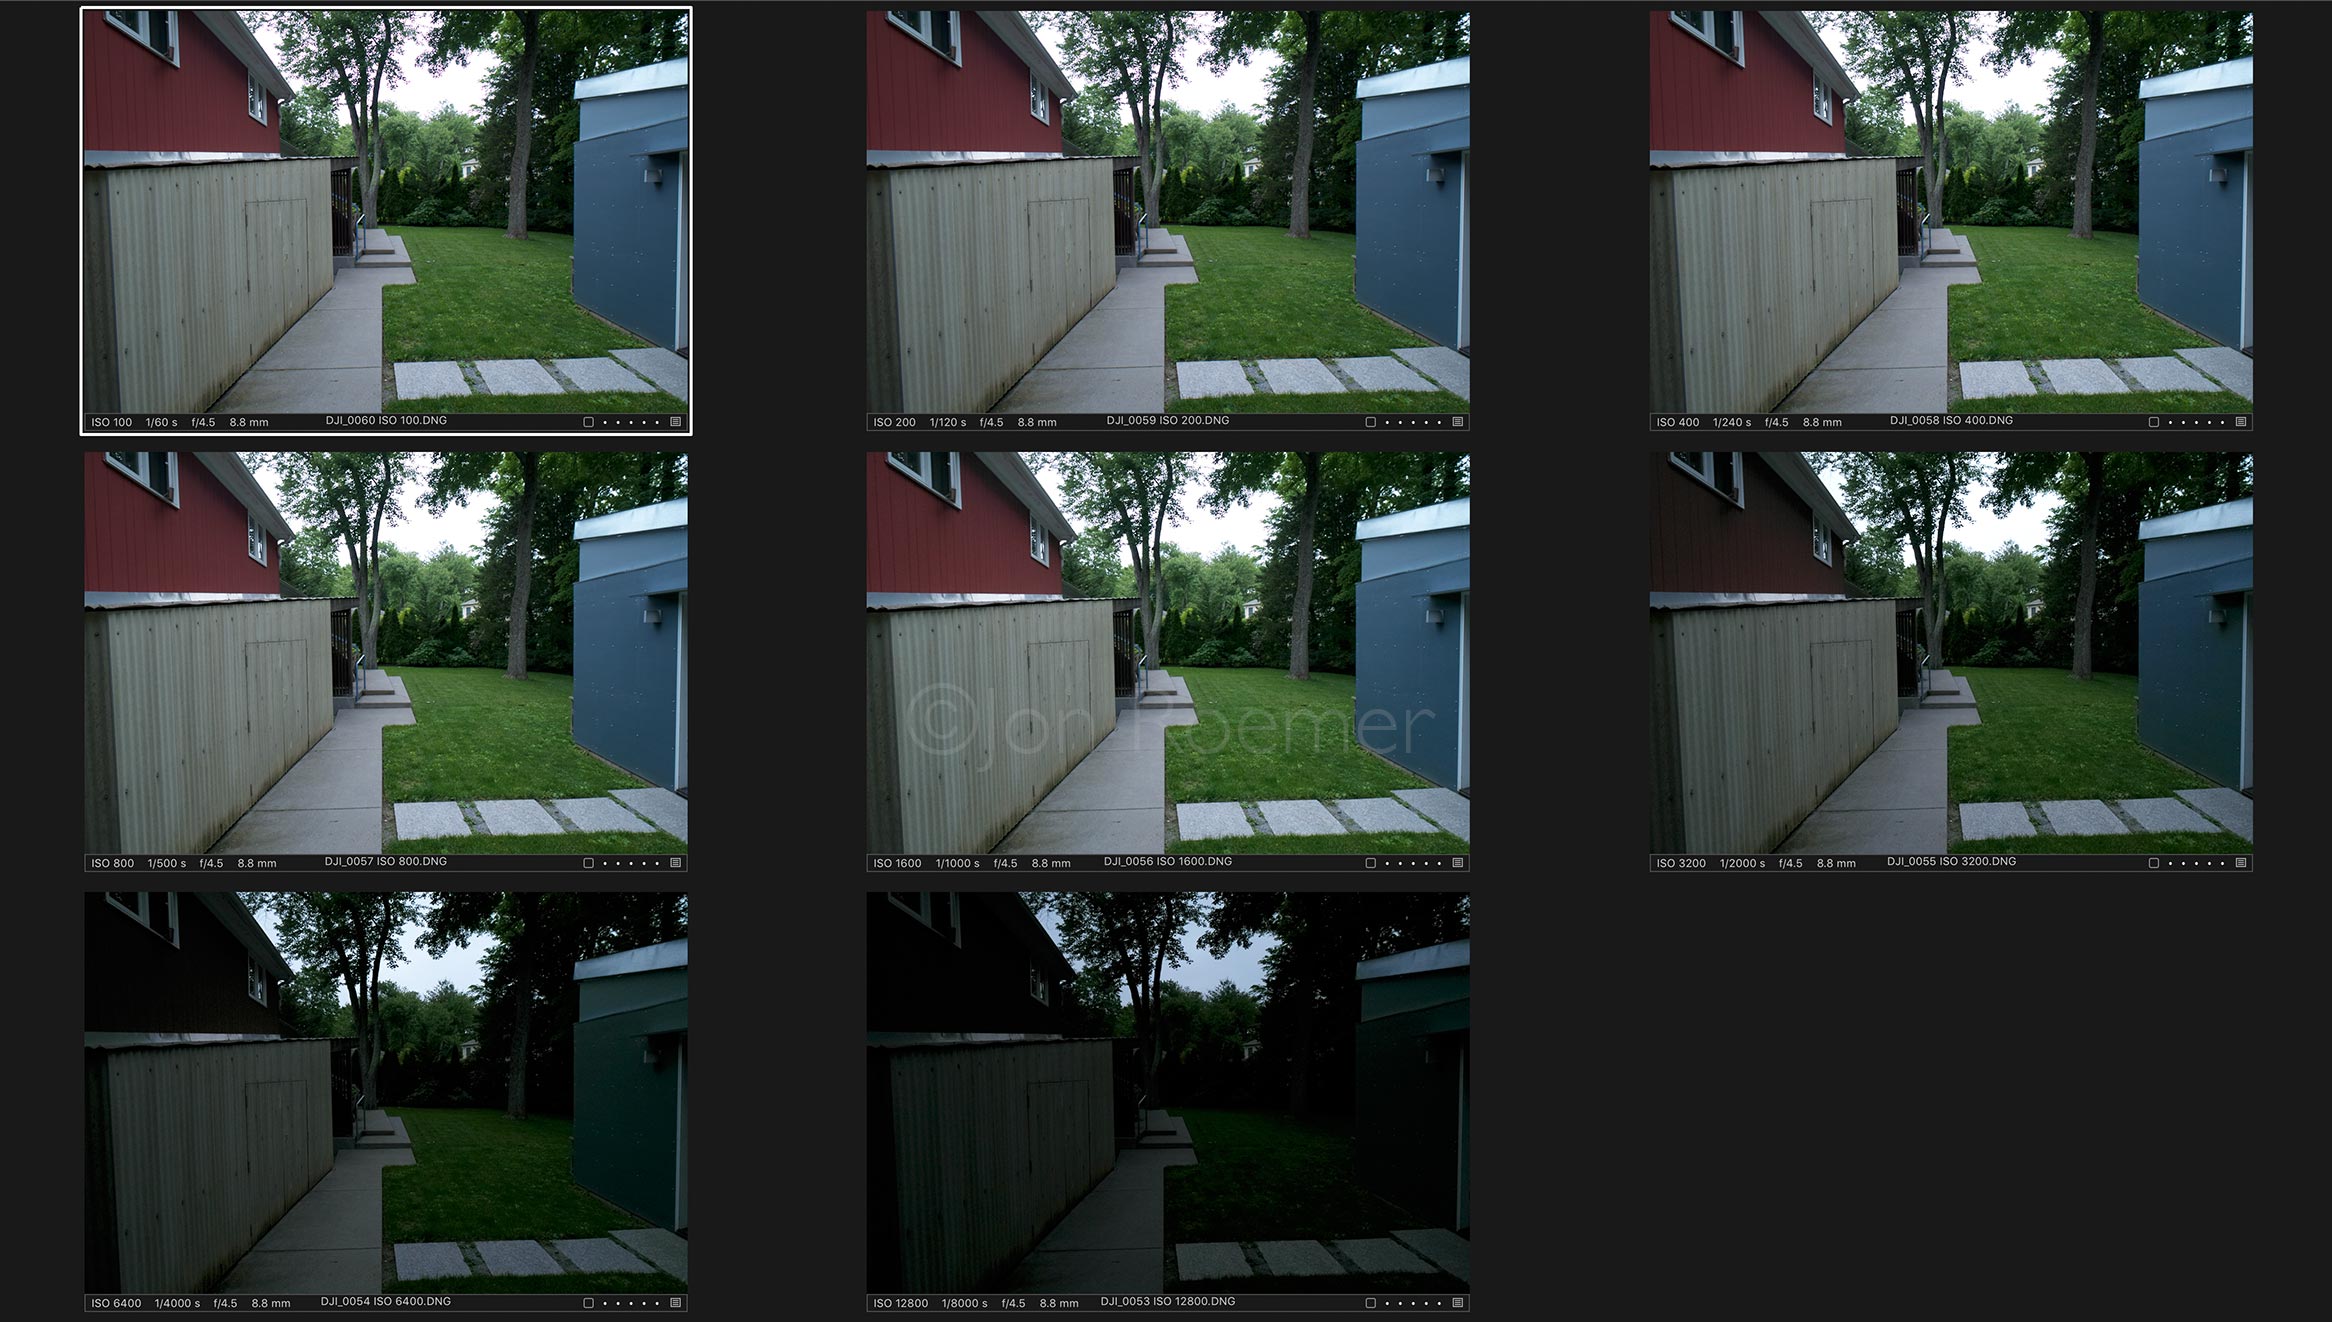

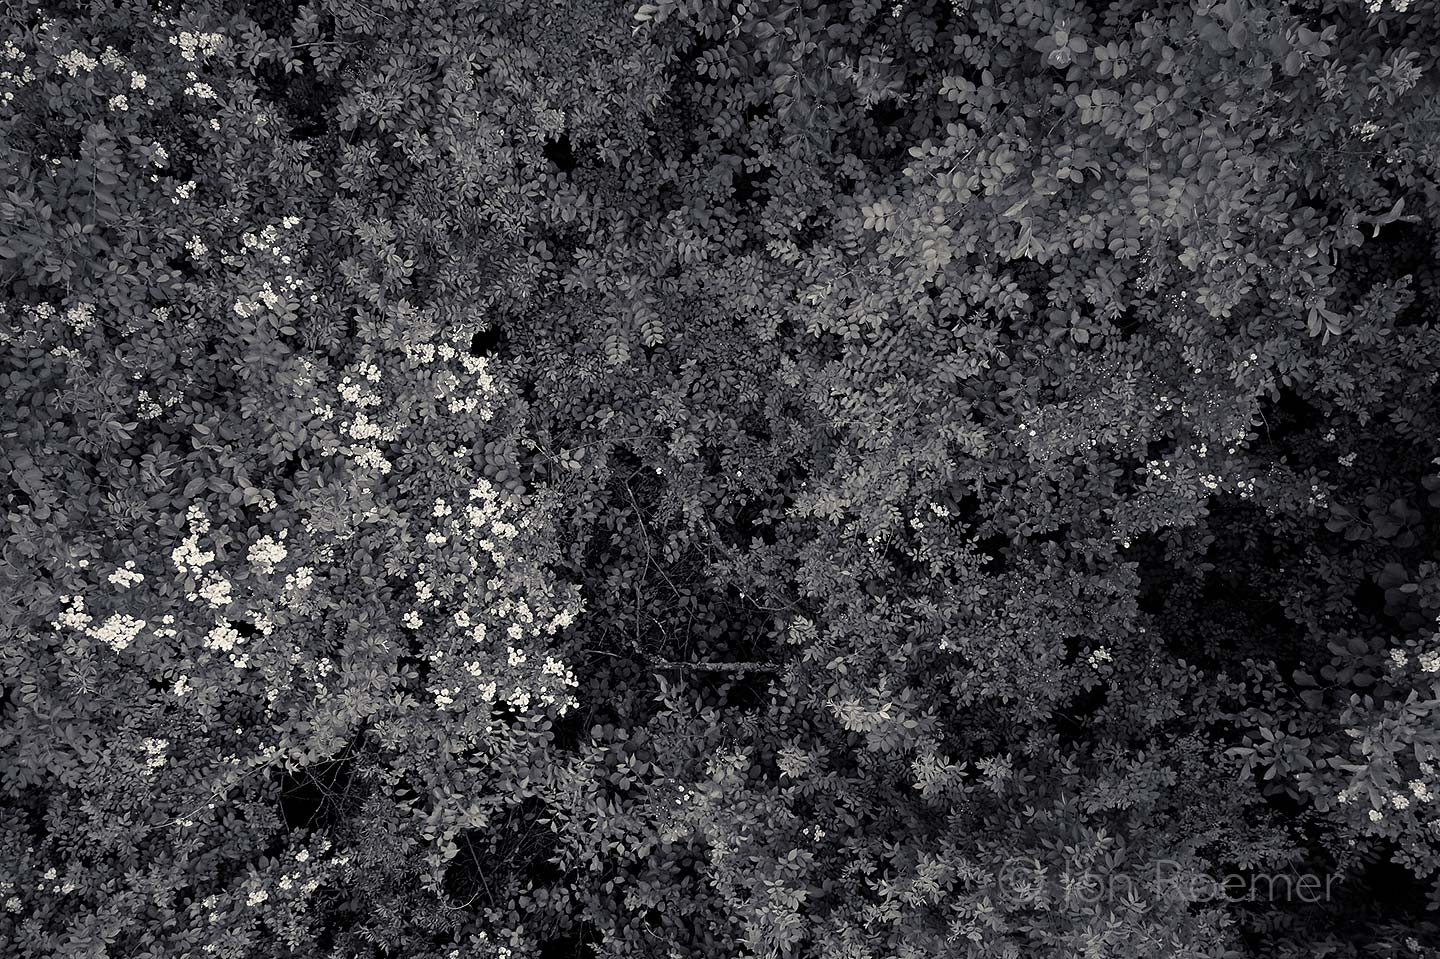
In the images above the Phantom 4 Pro’s ISO is being ramped throughout its range; ISO 100 – 12,800. The top images are each frames’ full capture, the bottom images view a portion of each image enlarged to 200%.
Looking at the ISO samples two things jump out at me. 1. Above ISO 1600 the Phantom 4 Pro’s camera loses sensitivity very quickly. Similar to what was called reciprocity failure with film, the Phantom 4 Pro’s camera at ISO 3200, 6400, and 12,800 is not doubling its sensitivity.
2. The more significant observation is seen in the 200% view. There the Phantom 4 Pro’s camera shows a fairly quick drop-off in detail and sharpness as the ISO is raised. So much so, that there is significant drop in image detail and sharpness between ISO 100 and 400.
The conclusion then is, if image quality is your primary goal you will want to stay at ISO 100 if possible and not go above ISO 200.
Aperture
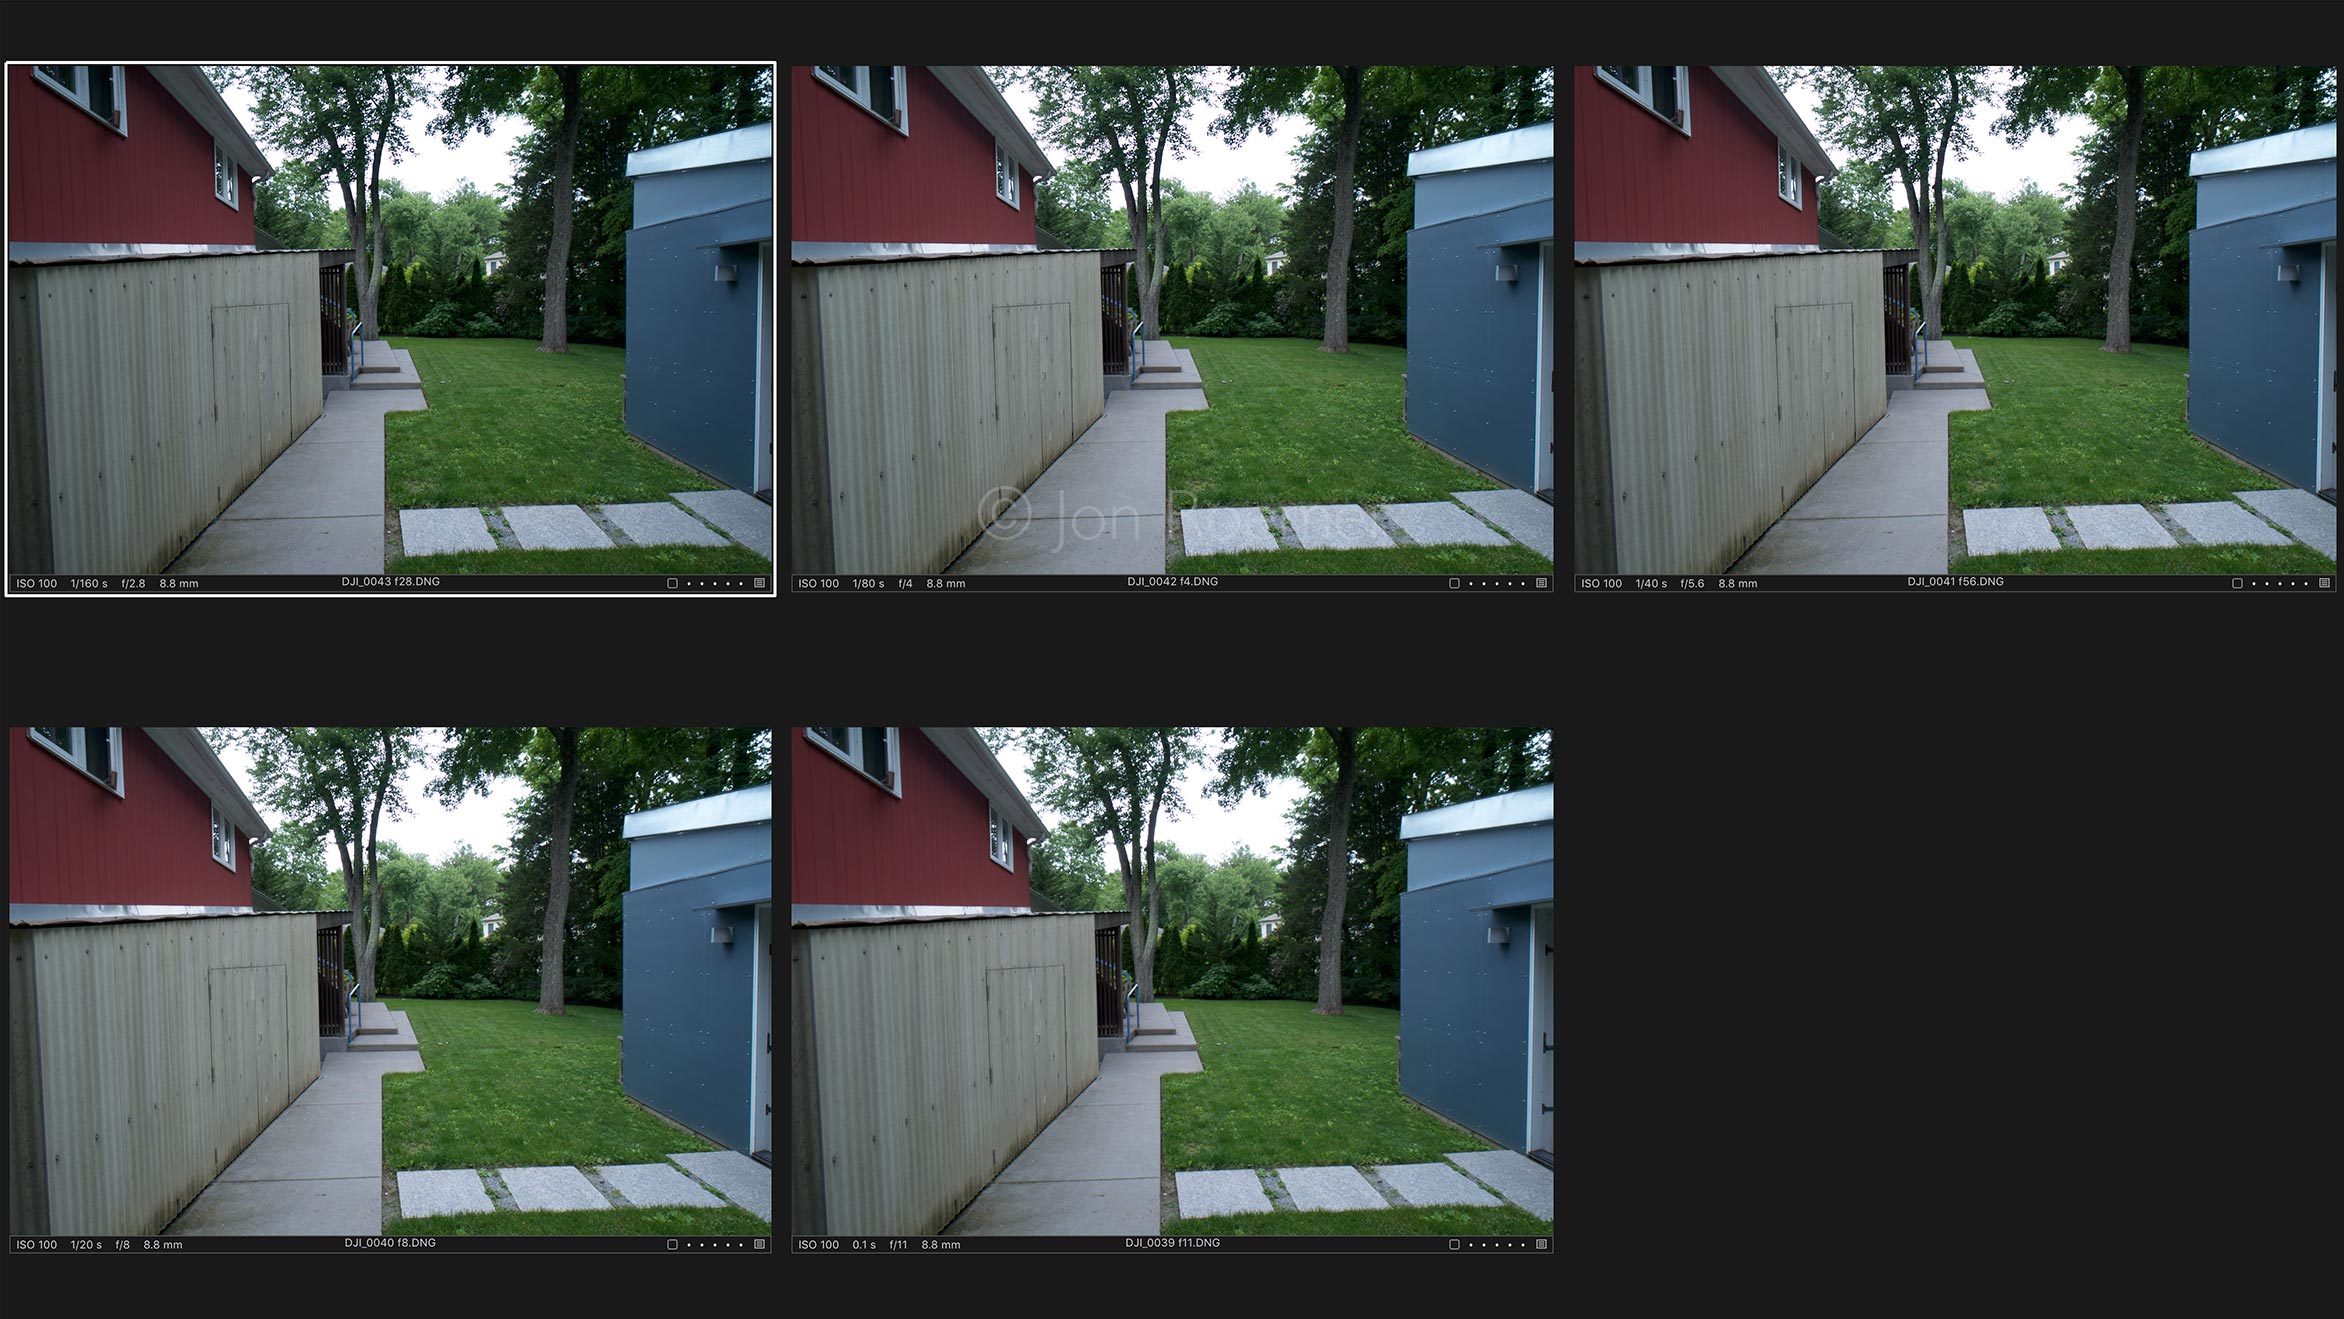

The samples above show an aperture ramp. The ISO remains constant while the aperture is increased with the shutter speed compensating to keep the exposure consistent.
As you can see in the full-image view, changing the aperture does not affect the camera’s sensitivity as it did when the ISO was altered. But similar to raising the ISO, stopping the aperture down, going from f/2.8 to a higher value, quickly causes the image to hit a tipping point where the image loses sharpness and detail.
Looking at the samples, the Phantom 4 Pro is sharpest at f/2.8 , f/4.0 is fine but I’d caution against going to f/5.6 or above if getting the sharpest, most detailed images is your goal.
The overall recommendation then is stay at ISO 200 or below and do not stop the lens down to f/5.6 or beyond.
Video Resolution
Those same recommendations will apply to video but video is also affected by the relationship between resolution and bitrate. Resolution is size of each frame. Bitrate is the amount of data the camera is able to capture and process.
The Phantom 4 Pro can record video at 1080 HD (1920 x 1080), 2.7K (2720 x 1530), and UHD 4K (3840 x 2160). It can also record DCI 4K and at a sub-1080 setting but for the purposes of this evaluation I am looking at the first three. They are the most common video resolutions.
The maximum bitrate of the Phantom 4 Pro is 100 Mbps, an increase of two-thirds over the Phantom 4’s 60 Mbps. A step in the right direction but still on the low side for 4K video capture.
Often when this is the case the camera will be better at resolutions below 4K. A case in point is a GoPro which can shoot 4K but which makes better quality recordings at lower resolutions. In order to evaluate the best resolution we need to look at the overall sharpness and detail when the camera is moving and when it is stationary.
The video above compares the Phantom 4 Pro at 4K, 2.7K, and 1080 HD in a 1080 timeline. The 4K and 2.7K resolutions have been down-rezzed to 1080 HD.
If you look closely you’ll see that the image is sharper and more detailed in 2.7K and 1080 HD than in 4K. 4K looses a lot of detail in high frequency areas like the grass when the Phantom 4 Pro is moving forward and overall it never has the same sharpness as the 2.7K or the 1080 HD settings. This is even more apparent in the original footage.
*So, adding to what we learned looking at the stills images, if shooting video ideally you want to film at ISO 200 or below and keep your aperture between f/2.8 and f/5.0 and you should consider filming at 2.7K or 1080 HD rather than 4K in order to retain the most detail in the image.
*Update: January 7, 2018:
Some readers have asked to see the two lower resolutions, 1080 HD and 2.7K, compared to 4K in a 4K timeline. The question being, if you are outputting at 4K are you better off filming at 4K or is there an advantage to uprezzing one of the lower resolutions?
This comparison leaves the 4K footage at its native resolution and it uprezzes the 2.7K and 1080 HD footage to match. I have not added any sharpening to the 2.7K and the 1080 HD clips.
The video above compares the Phantom 4 Pro at 4K, 2.7K, and 1080 HD in a 4k timeline.
In this scenario the 4K footage holds the upper hand. It is sharper and more detailed than either of the two lower resolutions. If I sharpen the lower resolutions the 2.7K clip does get closer to the 4K in feel. It is pretty indistinguishable from the 4K capture. But, that said, the 4K capture for 4K output makes the most sense. The less you have to do to an 8-bit file in post the better.
So, I would change my video resolution conclusion to read: …if shooting video ideally you want to film at ISO 200 or below and keep your aperture between f/2.8 and f/5.0 and you should consider filming at 2.7K or 1080 HD rather than 4K in order to retain the most detail in the image if your footage will be in a 1080 timeline. If your footage is going to be in a 4K timeline then shooting in 4K is recommended.
End – January 7, 2018 update.
Color Mode
Color mode refers to the color profile chosen for filming with the Phantom 4 Pro. It affects the dynamic rage, the saturation, and the overall color of video. It is not a factor when shooting raw stills. As of the most recent firmware there are four primary color modes: None, TrueColor, D-Cinelike, and D-log. There are others as well but they are heavy on applying a “look” and used to be called things like Vivid and Nostalgia. They are now listed in the Phantom 4 Pro’s color menus as “Film – A” through “Film – I.”
DJI does not offer any guidelines to what the color modes are other than what one can deduce, e.g. log is a log mode. TrueColor and D-Cinelike apply more subtle looks and None, in theory, is look-free.
Here are four clips, each showing one of the four primary color modes on the Phantom 4 Pro:
In the samples above each clip had the same exposure, sharpness, saturation, and contrast settings. The frame rate and resolution settings were the same, too. The only variable is the color mode.
In the past, with prior firmware versions of the Phantom 4 Pro or with the Phantom 4 and earlier models, color mode None was in my view the best way to go. If you turned down the sharpening, lowered the contrast and the saturation a bit in the custom settings, None worked very well. I never liked DJI’s D-log. Its color was poor, its image tended to look posterized, and the bitrate was too low to allow for proper grading. You can see this in the samples I show in A Phantom for All.
Back then TrueColor did not exist and Cinelike, now called D-Cinelike, tended to turn the shadows an odd color. All of the color modes then other than None, were capable of causing banding in the image.
What’s new now is that at first glance None, TrueColor, D-Cinelike, and D-log all seem viable. This is with firmware v01.01.03.0509 on the Phantom 4 Pro+. Here are the four clips seen above with grading added in FCP X.
I lowered the saturation for the None grade. TrueColor and D-Cinelike got their end points and midpoint tweaked. For D-Log I used Ground Control’s Falcon DJI Log -> 709 LUT and did further grading in FCP X.
Overall I’d say the jury is still out. I’m not convinced that D-log is adding any dynamic range but the image looks much better than in D-logs of the past. Odds are None with further tweaks to the custom settings will still be the best way to go (-1, -1, and -1 or -2 for sharpness, contrast, and saturation respectively.) I’d also want to test further with a color chart or in a more colorful situation. The test above is limited to greens and some blues.
One other note about the drone, nothing to do with image quality, is that I have the Phantom 4 Pro+. This is the model with the integrated screen as part of the controller. In the past six months of use I have come to really like this setup. It eliminates the need for a smart phone or a tablet. So, one less item to charge and two less to remember (the device and the cable to attach it.) The Phantom 4 Pro+’s 5.5″ 1000 nit screen is bright enough to use in full daylight and the overall package is lighter and more responsive than when I used my iPad and controller to run my Phantom 4.
The bottom line is that I love the image quality I can get with the Phantom 4 Pro. It’s a huge step forward and it excites me every time I see the copter’s output.
-> New blog post with additional Phantom 4 Pro information – Phantom 4 Pro – Thinking About Thinking <-
Nice job Jon! Very informative!! Thanks, Jim
Thanks Jim!