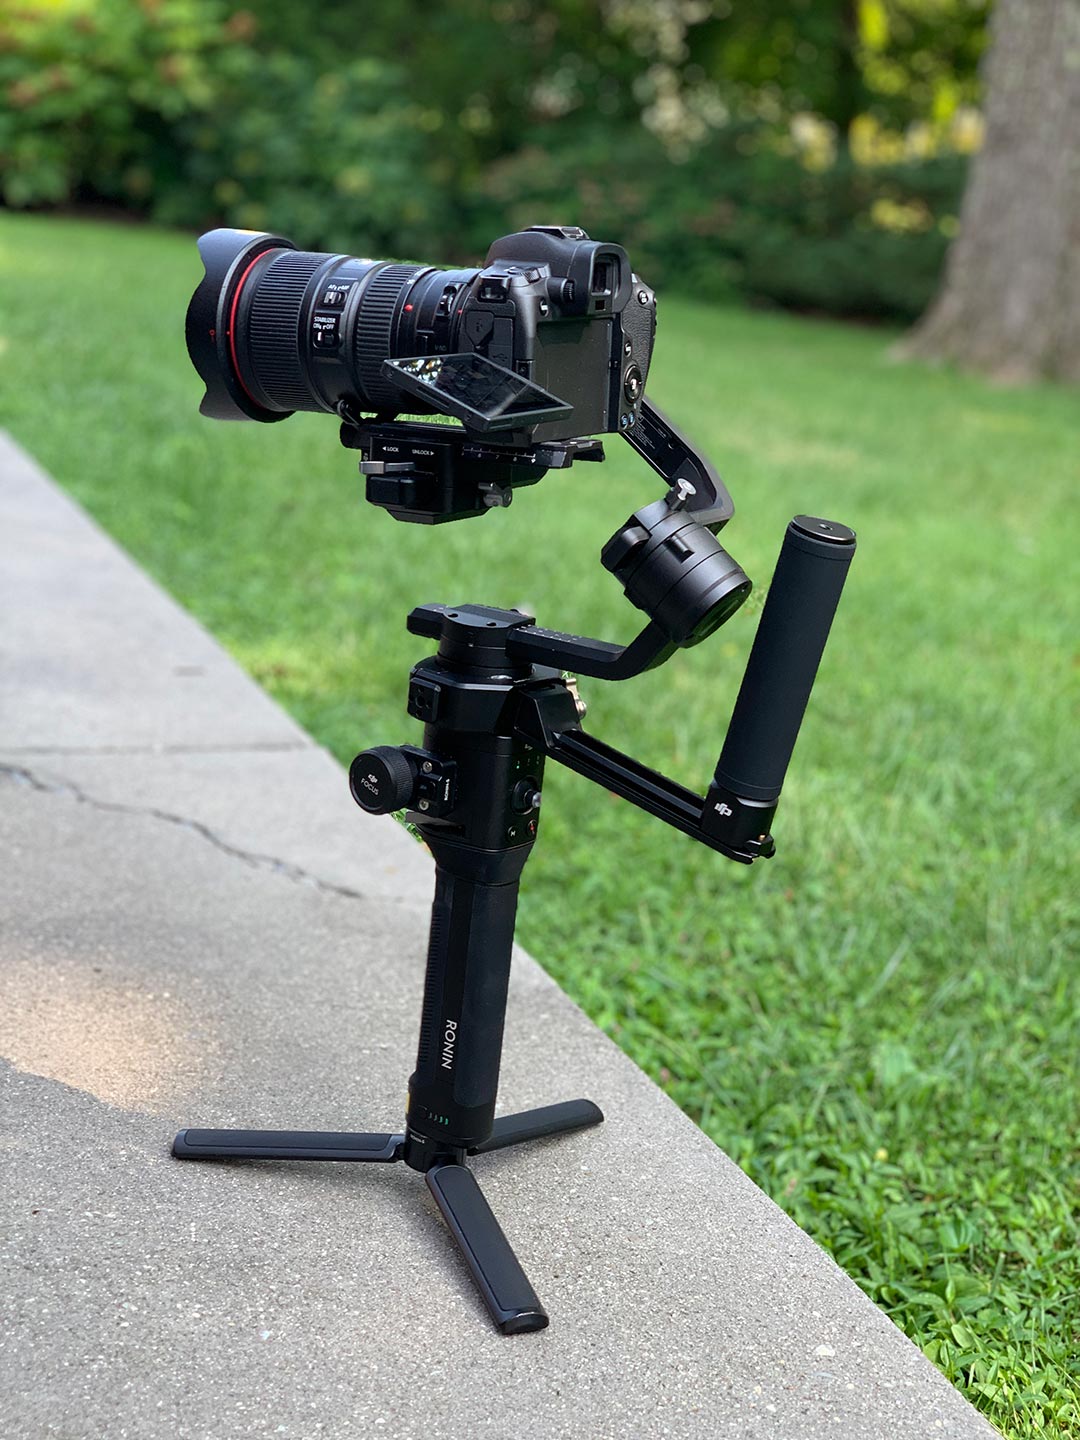
I have mentioned the DJI Ronin-S gimbal a few times here on the blog. I got it late last summer and since then it has become a standard tool for me on many projects. It’s an easy way to add sustained motion b-roll shots to videos with grab and go simplicity.
By design the Ronin-S is a single-handle gimbal with access to its controls just above the gimbal’s grip. Included with the kit is a small three-point stand, seen above. The stand can be collapsed together and used in combination with the grip to steady and control the gimbal.
Most people operate the Ronin-S with one hand up above, near the controls, and one hand down below holding the retracted stand. While that works it leaves the question open as to whether one would be better off with an accessory handle for the Ronin-S.
Traditionally, handheld gimbals are designed with a bar across the top and the gimbal hangs from that, or as seen in newer designs, the gimbals are encircled within a ring. You see this with Freefly’s Movi line and with DJI’s larger gimbals.
The point of each is to add more control over the gimbal by having the operator’s arms further apart. In terms of geometry, it’s pretty simple. A wider stance represents a bigger circle of movement to control the gimbal.
To pan a single-handle gimbal 5 degrees to the left will require very little movement. To move a double-handle gimbal will require a good deal more movement (think of the circumference, the distance traveled to make the move.) The latter is easier to control than the former.
Another option for one-handle gimbals is a second grip added to the bottom of the gimbal. A number of manufacturers offer this type of accessory and they often double as a mounting point to hold a monitor, free of the gimbal’s gyrations.
Below are two tests of the Ronin-S gimbal, each with three variations:
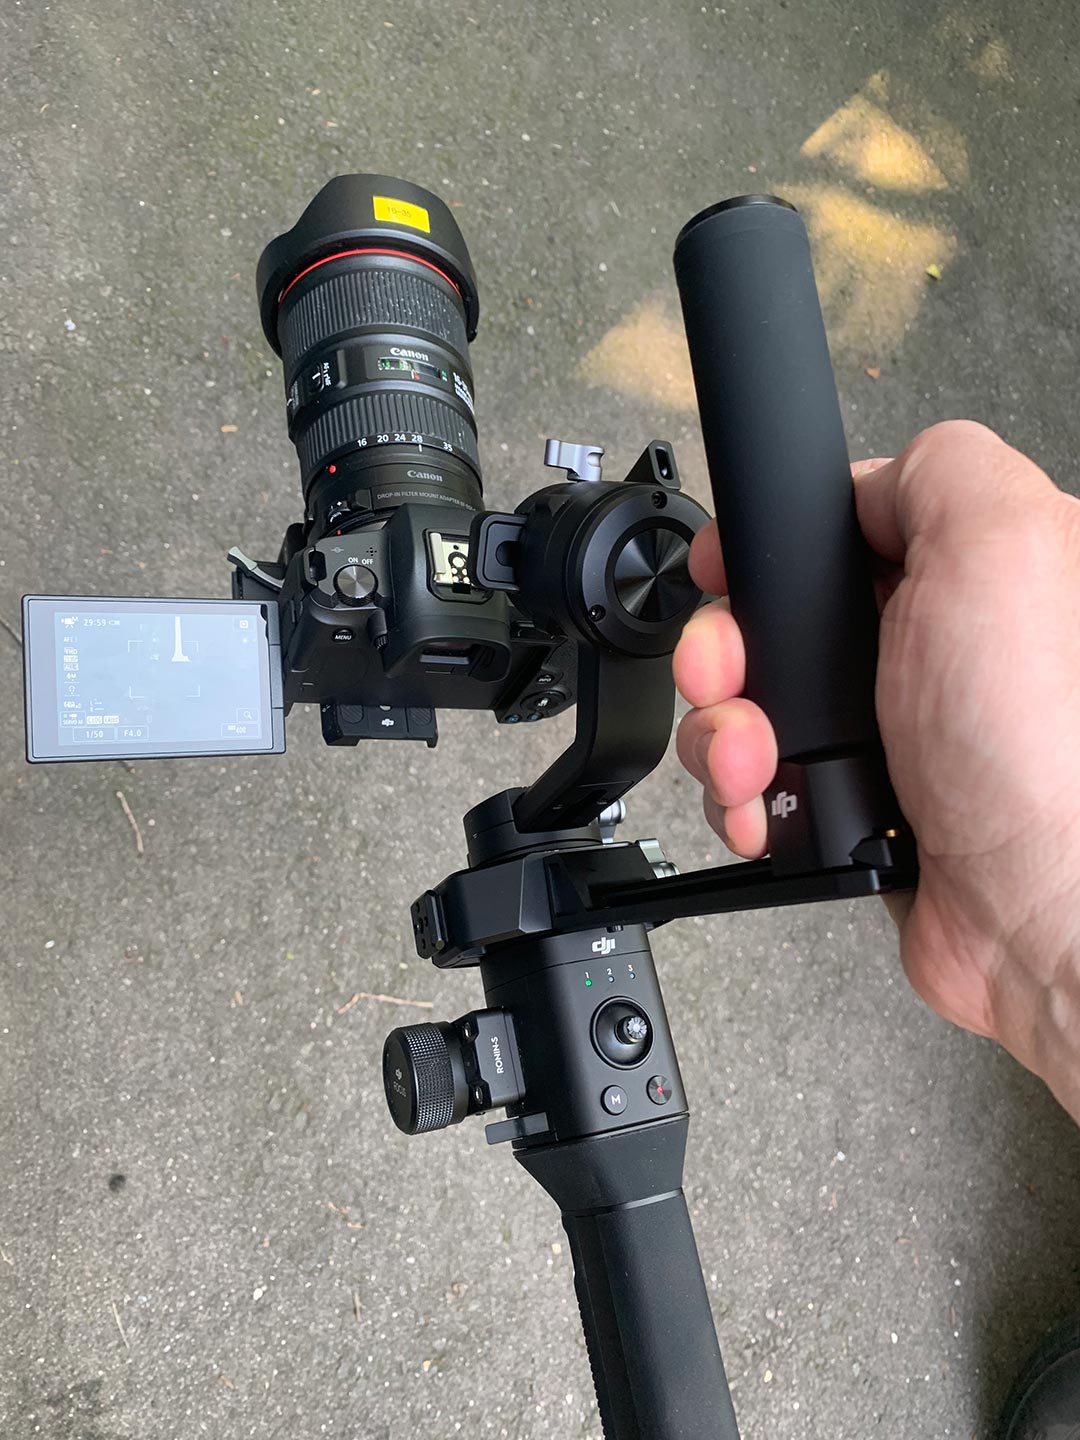
- The gimbal operated via DJI’s new Switch Grip Dual Handle for the Ronin-S ($129). This is a wider stance bar with two handles.
- The gimbal operated with the Ronin-S’s built-in single grip.
- The gimbal operated with the addition of a SmallRig Universal Wooden Side Handle ($79). This is a bottom mounted grip which adds one handle to the gimbal.
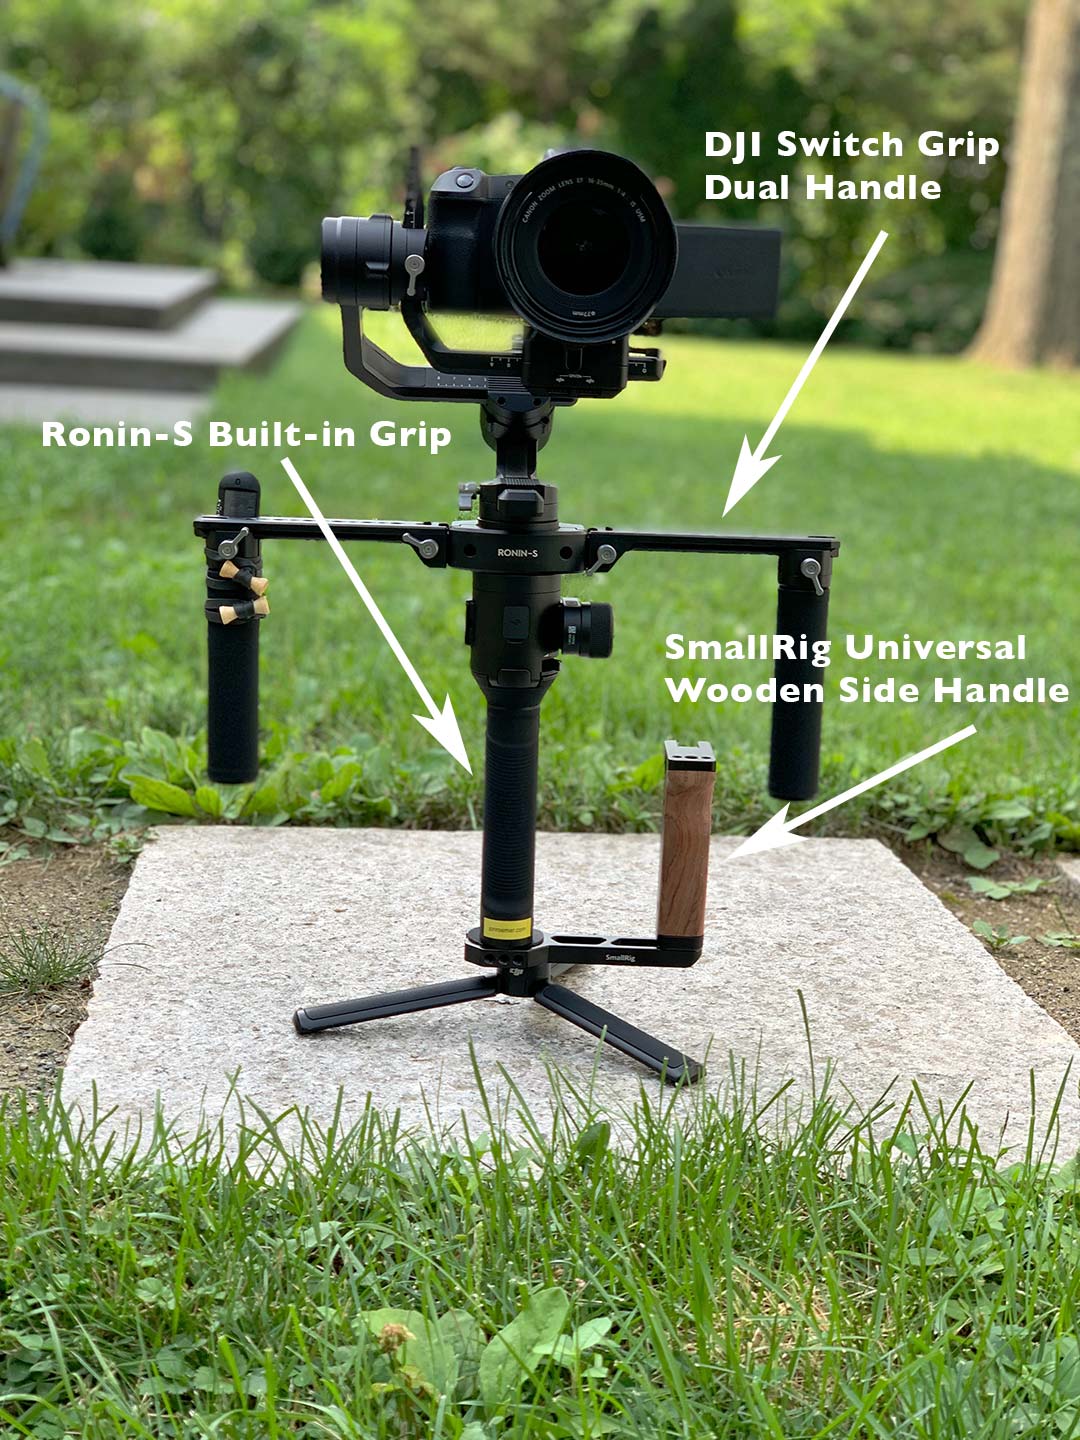
Please note: The images above and below are for illustration only. You would never need to mount all of these accessory handles at once.

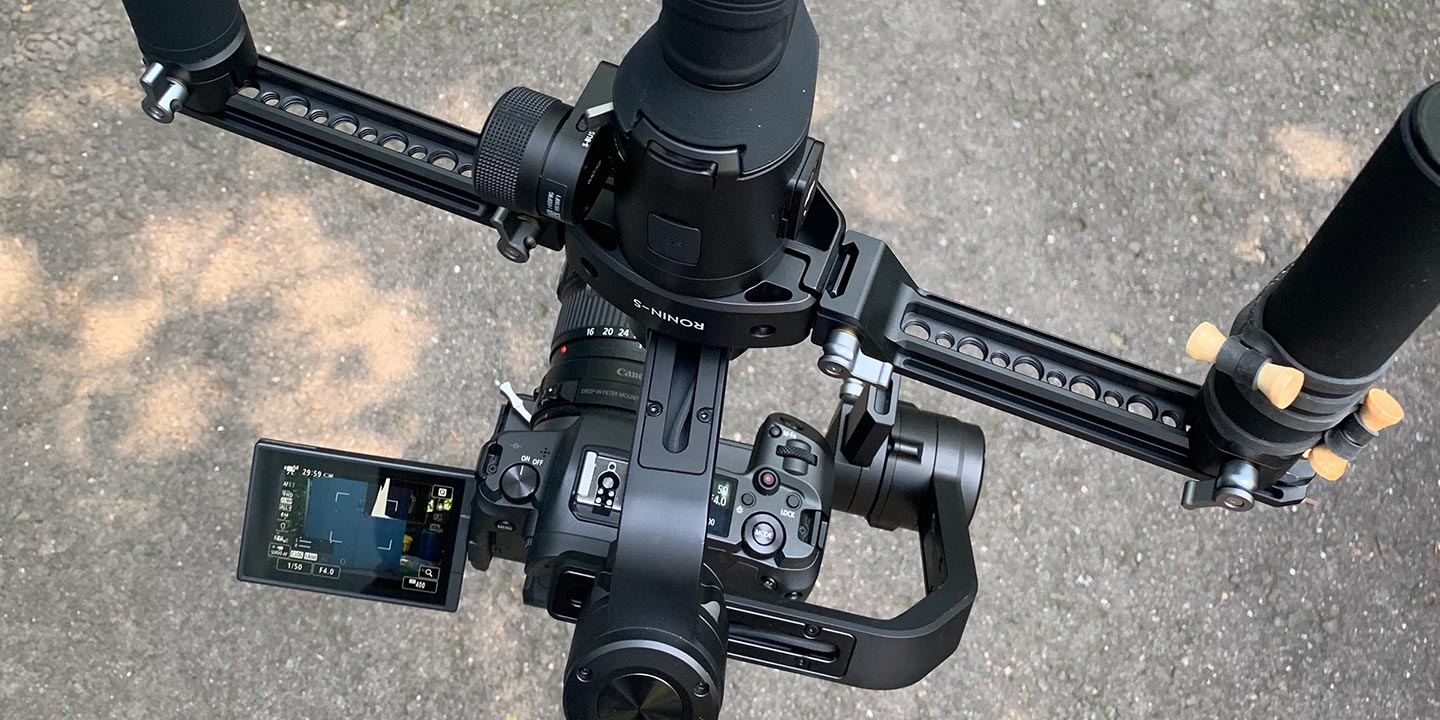
The DJI Switch Grip Dual Handle mounts via a fitted ring just below the Ronin-S’s pan axis. It has two NATO rail arms and two handles which attach to them. This makes the span of the handles adjustable as well as their positioning.
They can be configured to point down or to point up. There is also third option to run one handle coming back behind the camera, perpendicular to what you see above. This could be helpful for a flashlight mode orientation where the gimbal is pointed forward horizontally. (See below, Test 3)
The SmallRig Universal Wooden Side Handle mounts to the base of the Ronin-S and sits to the left of the gimbal’s built-in grip as seen from behind the camera.
Test 1
DJI Ronin-S Accessory Handles Test 01 on YouTube and Vimeo.
Camera travels up two steps and then four steps, turns around, and returns via the same route.
Test 2
DJI Ronin-S Accessory Handles Test 02 on YouTube and Vimeo.
Camera travels through a small alleyway, takes a sharp left, circumnavigates a tree, and returns back over the same route.
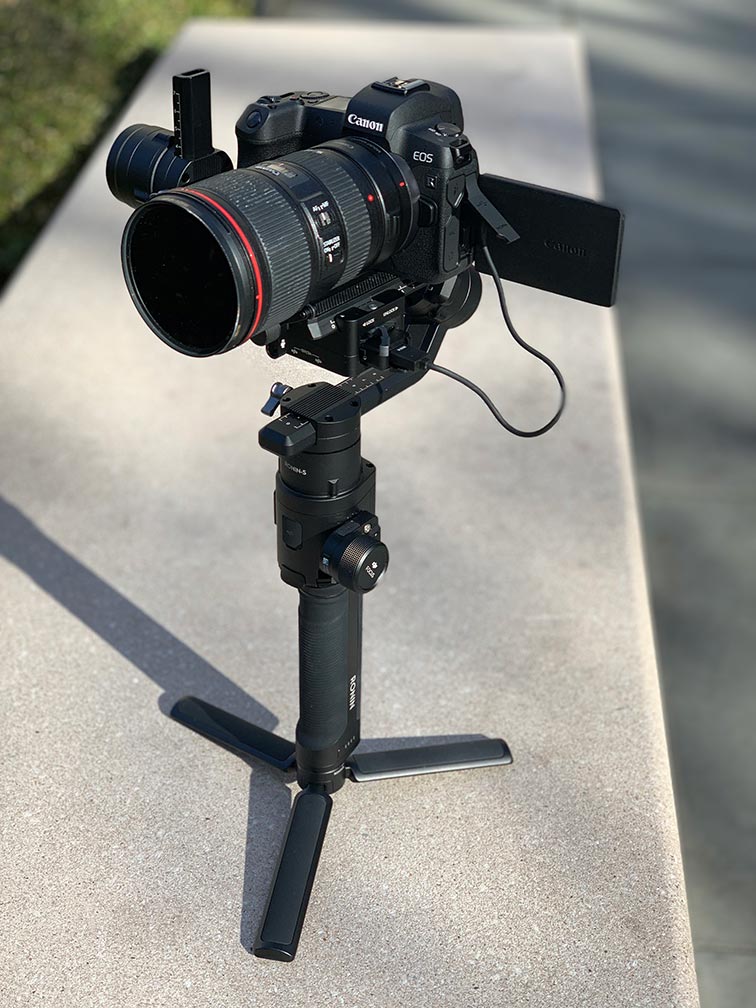
All of the tests were filmed with a Canon EOS R in full-frame 1080 mode in C-log. 23.98 fps with 1/50 second shutter. The lens was a Canon 16-35 f/4L IS USM zoom at 24mm and f/4. Canon’s EF-EOS R Mount Adapter with a drop-in vari-ND filter was also used to control the light. No image stabilization was added in post.
Music is Siesta by Jahzzar via the Free Music Archive.
Thoughts
The smoothest performance is with the Switch Grip Dual Handle. The least smooth is with the Universal Wooden Side Handle. The Ronin-S’s built-in grip falls somewhere in between.
All of the options suffer from z-axis bounce but that is to be expected. None of these methods will ever fully mitigate bounce along the direction of travel.
All in all I’m not surprised at the results though I would have expected the Universal Wood Side Handle to be better than the Ronin-S’s built-in grip. Thinking it through though, it all makes sense. The Switch Grip Dual Handle adds a wider stance closest to the gimbal head. As such, the balance for the person operating is better and the wider stance of the handles allows for much more control especially when panning the gimbal.
The Universal Wooden Side Handle sitting at the base of the Ronin-S makes it harder to control the gimbal, even vs. the Ronin-S’s built-in grip, and it makes for the most z-axis bounce of the three methods.
In terms of negatives, any accessory handle adds weight and the Ronin-S at 4 lb. is already heavy. The Switch Grip Dual Handle adds ~1.3 lb. It’ll be up to the operator whether that hits a tipping point or if adding the two handles helps mitigate the weight gain and the strain. The Ronin-S is certainly easier to control with the Switch Grip Dual Handle but it can be a bit more tiring because of the need to hold the gimbal out further.
The Switch Grip Dual Handle is very simple. A center mounting ring, two NATO arms, two handles, and lock-down knobs. In addition to holding the handles the NATO rail arms are cheese sticks with a multitude of ¼” and ⅜” mounting points.
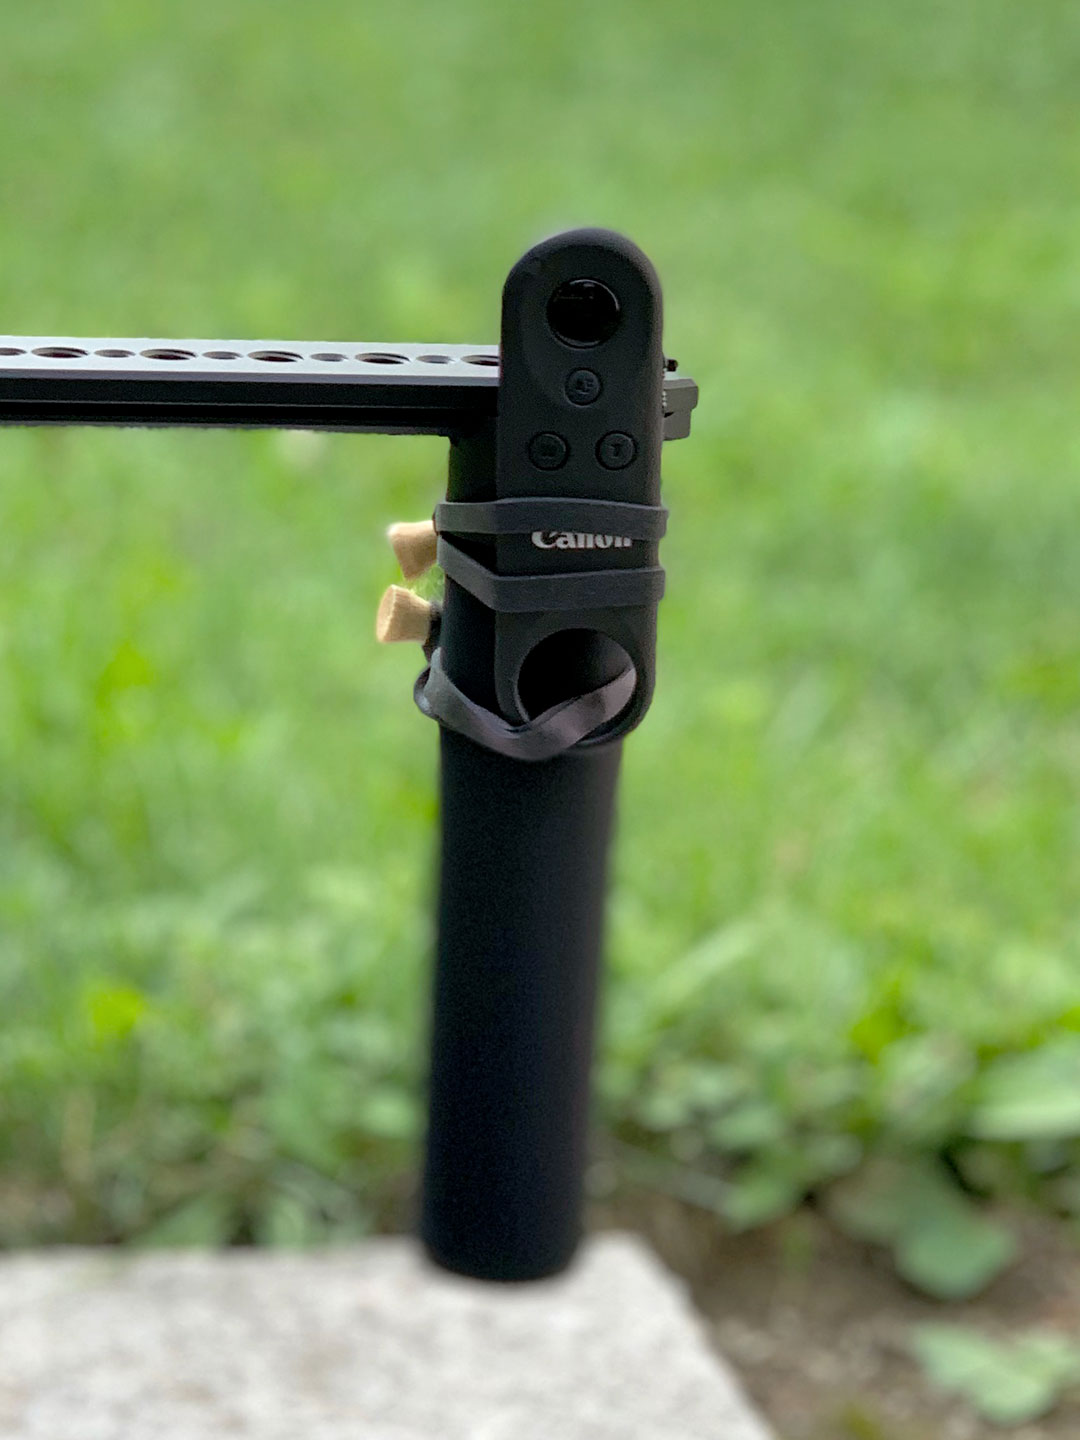
It would have been nice to see DJI create something more sophisticated which moved the gimbal’s controls over to one of the side handles. For myself, as a Canon EOS R user, I created a small work around. I used BongoTies to attach the R’s Bluetooth remote to one of the handles so that I don’t have to bounce a hand from the center column to a side grip and back to start/stop recording on the camera.
Barring the introduction of a more sophisticated dual handle grip for the Ronin-S, it would be great if DJI could release a product or two to reduce the weight of the gimbal. For example, the Ronin-S’s grip based battery is rated at 12 hours and weighs about a pound. What about a battery rated for three hours that is ¼ the weight of the current one?
In the past week DJI released a more compact version of the Ronin-S, the Ronin-SC, which is geared toward mirrorless cameras. It is smaller and lighter than the Ronin-S by a couple of pounds and it takes a reduced payload, 4.4 lb. vs 8 lb., but it doesn’t work with my kit.
The EOS R, especially when used with a mount adapter and an EF lens, is a bit too big. The Ronin-SC should work well with Sony, Fuji, and Panasonic mirrorless cameras. That said, the same issues about using its built-in grip vs. one with a wider stance will remain.
—
Here is a third test, a deeper dive into using the Dual Switch Grip Handle (this blog post has become more of a DJI Dual Switch Grip Handle review). It explores Flashlight Mode vs. Underslung Mode with the Ronin-S and the Dual Switch Grip Handle.
For Flashlight Mode only one of the Switch Grip Dual Handle’s grips is used. It is mounted parallel to the Ronin-S’s controls and its built-in grip which is to say that the arm for it points back toward the operator. You can direct the handle toward the camera or away from it.
In operation you will hold the Ronin-S’s built-in grip with your dominate hand and the Switch Grip Dual Handle’s grip with your other hand.
Underslung Mode orients the camera beneath the gimbal. You can set the Switch Grip Dual Handle’s grips pointed up or down depending upon how high or low you want the camera to ride.

Test 3
DJI Ronin-S Switch Grip Dual Handle Test 03 on YouTube and Vimeo.
With the Ronin-S in Flashlight Mode and having added the one Switch Grip Dual Handle grip, the camera follows Caesar down a step, pausing for a stretch, and during a jaunt into the studio. This is followed by two camera runs and a side-by-side of each as the camera follows the same route seen in Test 2 but in Flashlight Mode and in Underslung Mode.
Test 3, like Tests 1 & 2, was filmed with a Canon EOS R in full-frame 1080 mode in C-log. 23.98 fps with 1/50 second shutter. The lens was a Canon 16-35 f/4L IS USM zoom at 28mm and f/4. Canon’s EF-EOS R Mount Adapter with a drop-in vari-ND filter was also used to control the light. No image stabilization was added in post.
Music is Siesta by Jahzzar via the Free Music Archive.
Thoughts About Test 3
Flashlight Mode works great for the Caesar clip and is better than Underslung Mode on the alley-to-tree-and-back-again run. For the latter this is most likely because Underslung Mode is somewhat awkward to hold or walk quickly with and I suspect that wipes out any advantage of that mode’s wider grip to control the turns.
Final Thoughts About the Switch Grip Dual Handle
The Switch Grip Dual Handle has a fit and finish on par with that of the Ronin-S. It’s a perfect match. So much so that the center ring of the Switch Grip Dual Handle fits over four small bump-outs on the Ronin-S’s body creating an anti-twist lock. It’s a great design.
Once that ring is mounted by tightening two hex screws, it will not move and you will not need tools to work with the arms and grips of the Switch Grip Dual Handle. They mount via NATO rail and they have built-in lock-down knobs. Leave the center ring on and you are good to go. You can add the arms and grips as needed on the fly.
There are other two-handled bar based third-party grips on the market for the Ronin-S. They all weigh about the same as the Switch Grip Dual Handle but they all mount beneath the Ronin-S’s controls and they attach to the Ronin-S’s built-in grip, which is also its battery.
What that means is that those accessories will be harder to balance as you hold the Ronin-S, and should you need to swap the gimbal’s battery out, you’ll also have to swap the accessory handle to the new battery. Also, none of those accessories will be as quick to switch from two handles down to one for Flashlight Mode and the same balance issues will remain.
I’m very happy with the Switch Grip Dual Handle and it does seem to be the best option at this point for adding additional grips to the Ronin-S as long as the added weight is not an issue for the user.
—
Update – 08/28/2020:
I have a recent post on using a much bigger camera, the Canon C500 Mark II, on the Ronin-S.
If you are looking for other posts or other samples with the Ronin-S this will show the posts tagged “gimbal”.