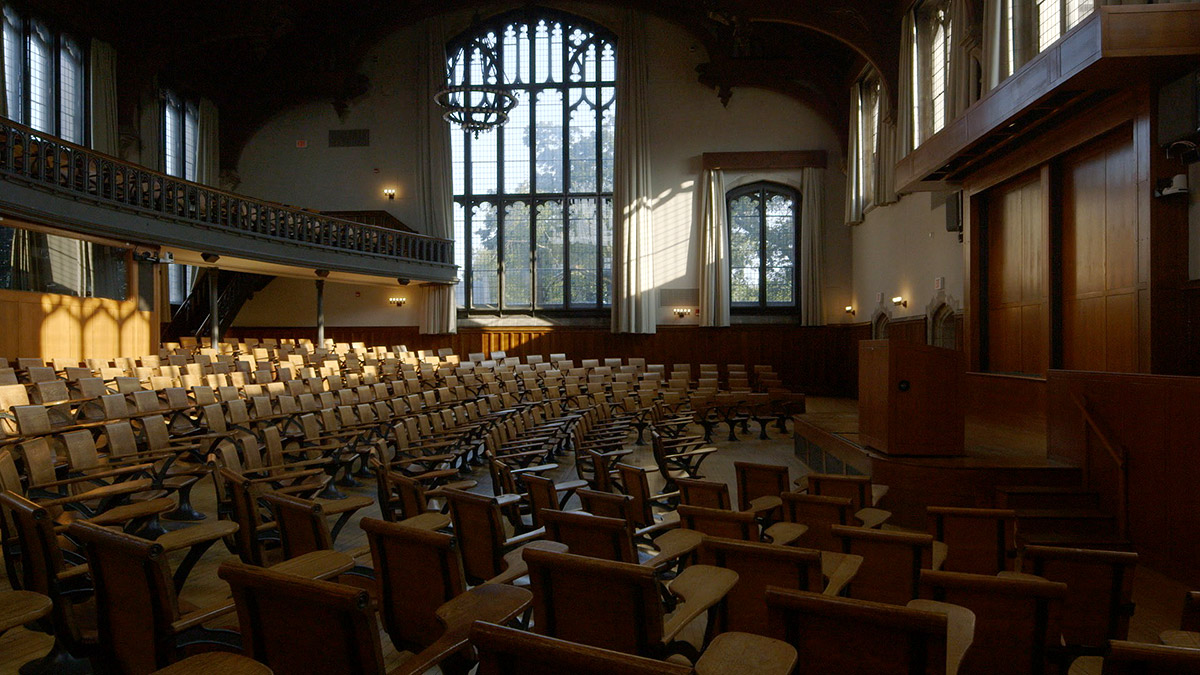
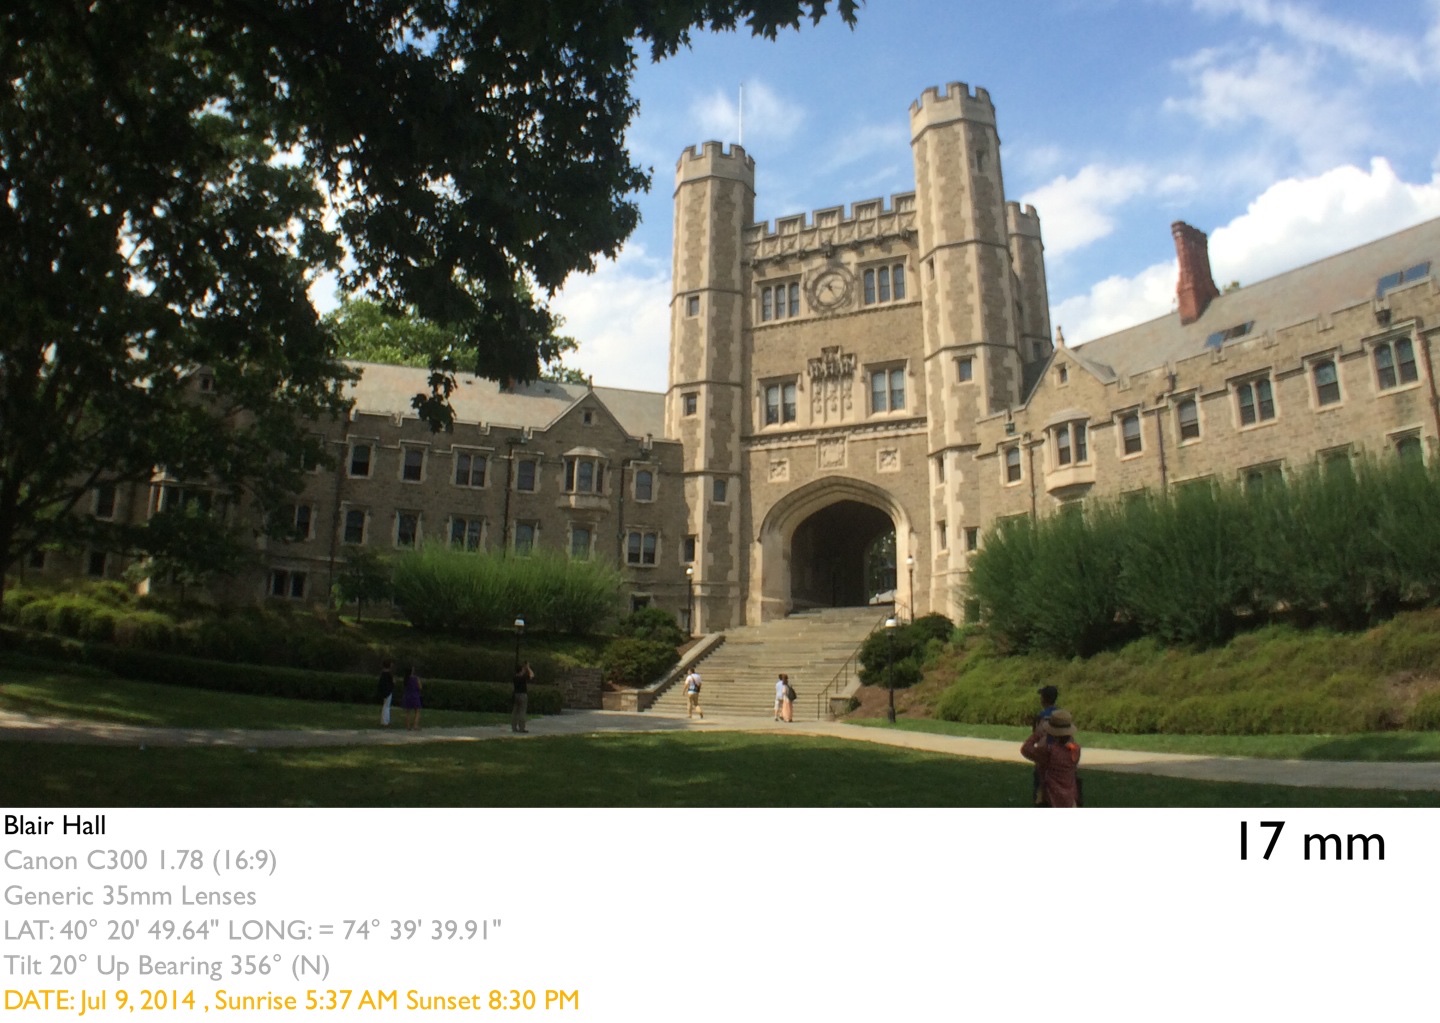
For, A Magical Sense of Space, I was asked to create a film which would convey the beauty of Princeton University’s campus and show how the new Lewis Center for the Arts will fit within it.
The tone was to be reverential, drawing upon existing spaces on campus which are part of every Princetonian’s DNA. These would then be mixed with drawings and models of the new arts center.
Limitations were that only certain buildings could be shown and that the film would be shot during the summer when students are not on campus. Interviewees would be Steven Holl, the architect of the new Lewis Center for the Arts complex, and Ronald J. McCoy, the University Architect at Princeton.
I know the Princeton campus really well. I grew up in town and spent my formative years biking all over the grounds, treating it as my backyard. This was one of those, “I was born to do this job,” jobs.
The first step in the project was coming up with a conceptual framework. I knew I wanted to keep the camera moving in order to hold interest and to better convey the three-dimensional spaces I would be showing. What made the most sense was literally moving the camera forward through the spaces – it would enable seamless transitions between the clips and it worked perfectly as a metaphor. Moving from the old to the new, building on the old to create the new, reverence for the past while looking to the future.
Proof of Concept – Slider Speed Tests – Slider Support Tests
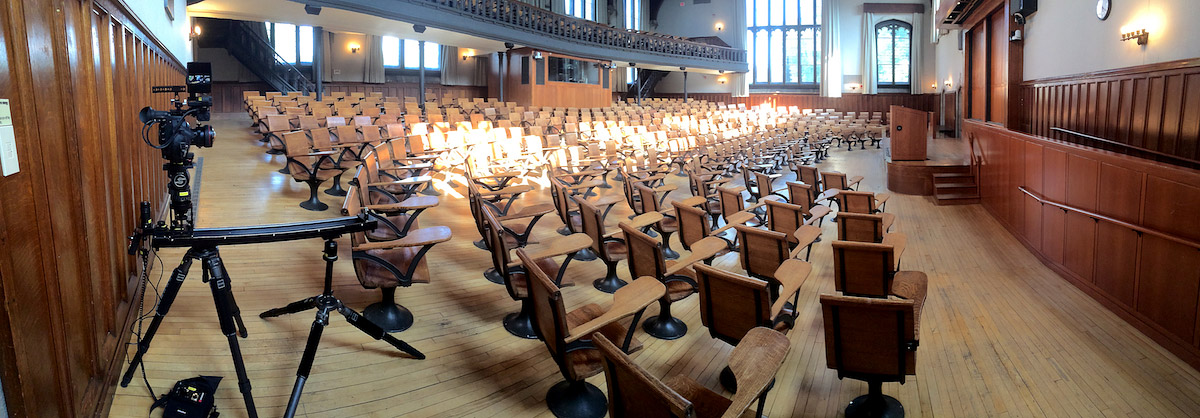
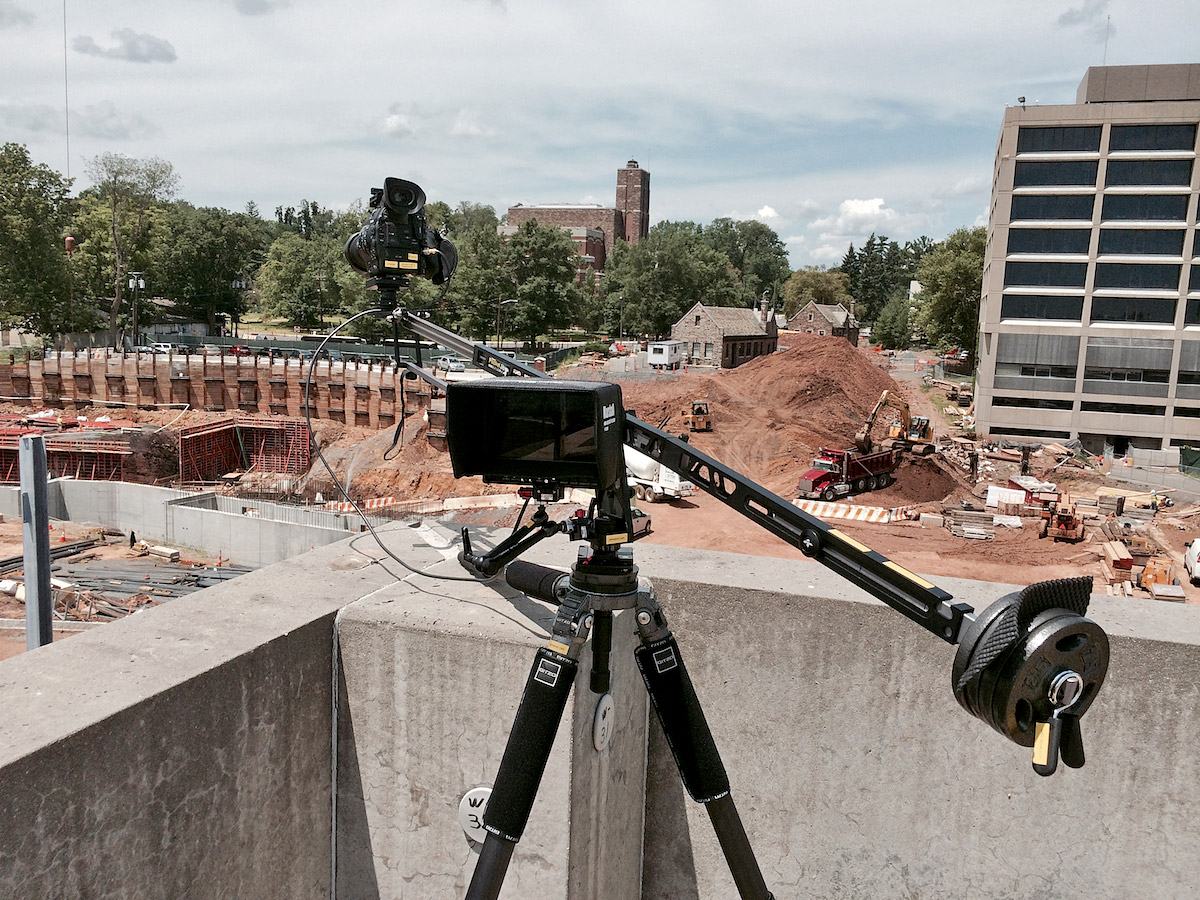
Moving the camera forward is essentially a push-in and for this project I would need to do it at a repeatable speed for interiors, exteriors, and over uneven terrain. Since each shot would not need to be very long I ran tests to see if my 3′ slider would be up to the task.
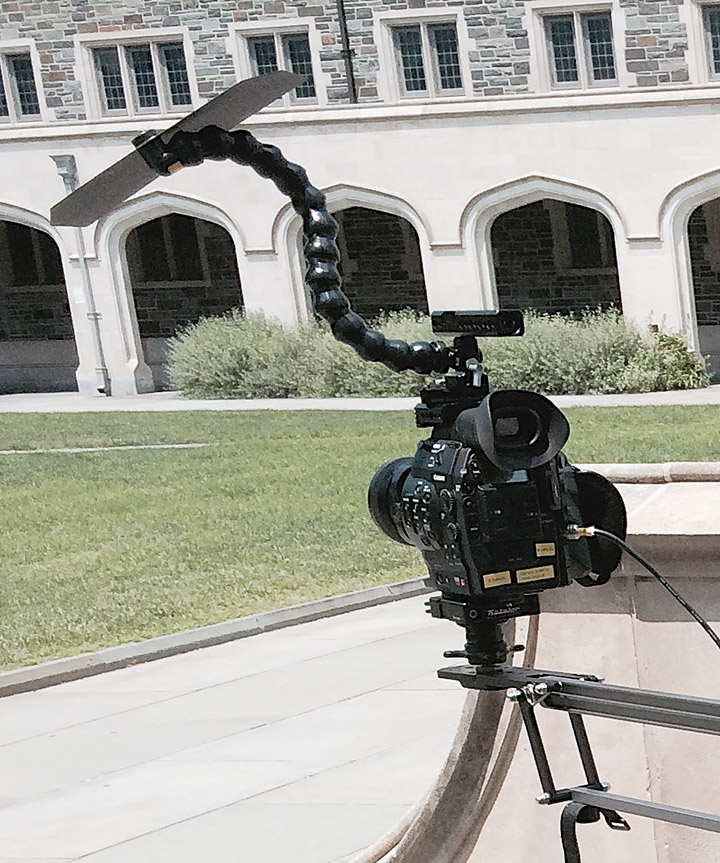
The tests were done with the slider, a Kessler 100 Series Motor, and a Kessler elektraDRIVE BASIC Controller. The numbers in the video refer to speed settings on the controller (ramping was done manually.) A Canon C300 with 17mm TSE lens was used.
3′ Cineslider Speed Tests with Series 100 Motor (2014) on YouTube.
As you can see, ideally you want something in the foreground (a good rule of thumb with any slider) but there is no one optimal speed. The best speed depends upon the size of the space/building being filmed and whether foreground objects are present.
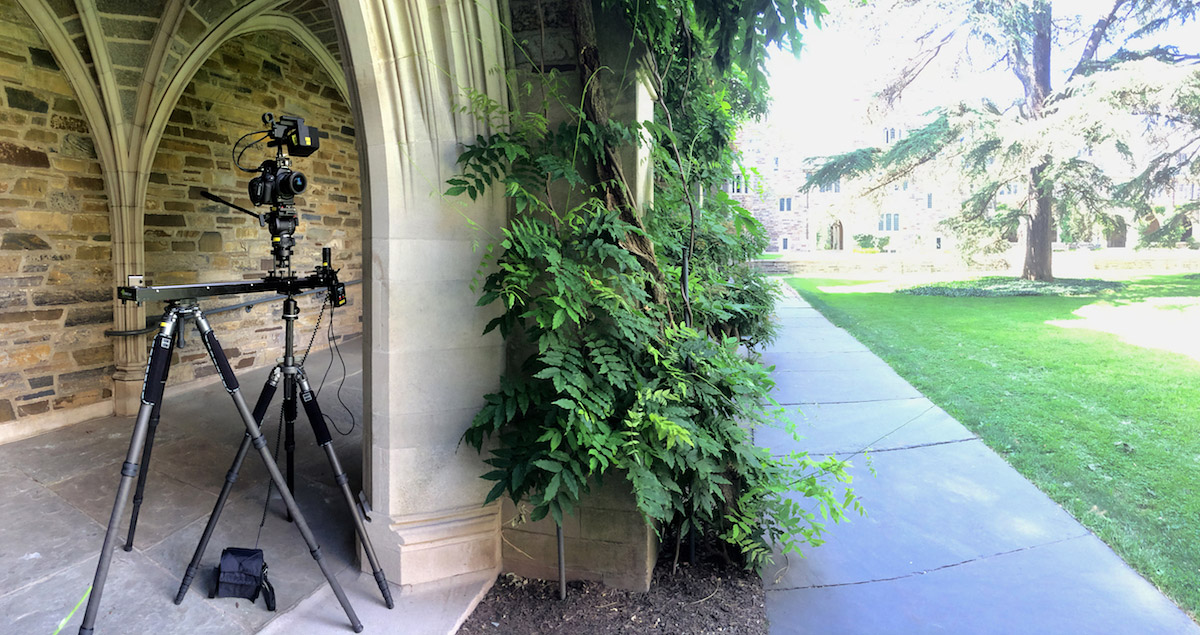
All said, the 3′ slider did work and that’s what I used. A 5′ slider might have helped in some situations but it would have presented its own issues in terms of lens selection and the height of the camera above the slider (see below in the Camera Kit section.) In cases where the 3′ slider couldn’t create quite enough perceived motion on set (e.g. a large building with little in the foreground) I was able to supplement the slider movement with a subtle software based push-in in post.
In terms of slider support – I had hoped to use a center mount. It would have been very quick to set up and break down. Kessler makes a slider plate for that purpose but in my testing I found that with a heavier setup (e.g. C300, fluid head, high-hat) it’s impossible to use the slider plate and not get some downward flex when the camera is at either end of the slider. For this project, filming architecture, a center mount would not be within tolerances.
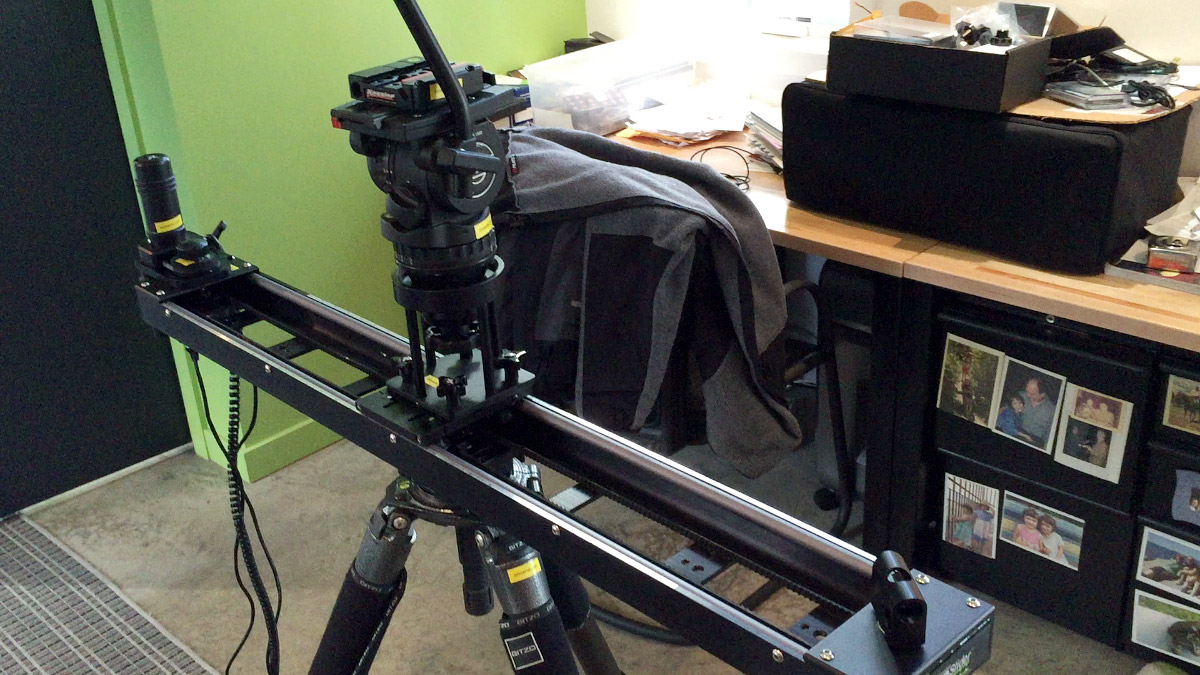
A double support, one tripod on each end of the slider, was the answer. Some people are able to get by using a tripod at one end and a light stand at the other but I found that too hard to adapt to uneven terrain (e.g. stairs, sloping floors, the ground.)
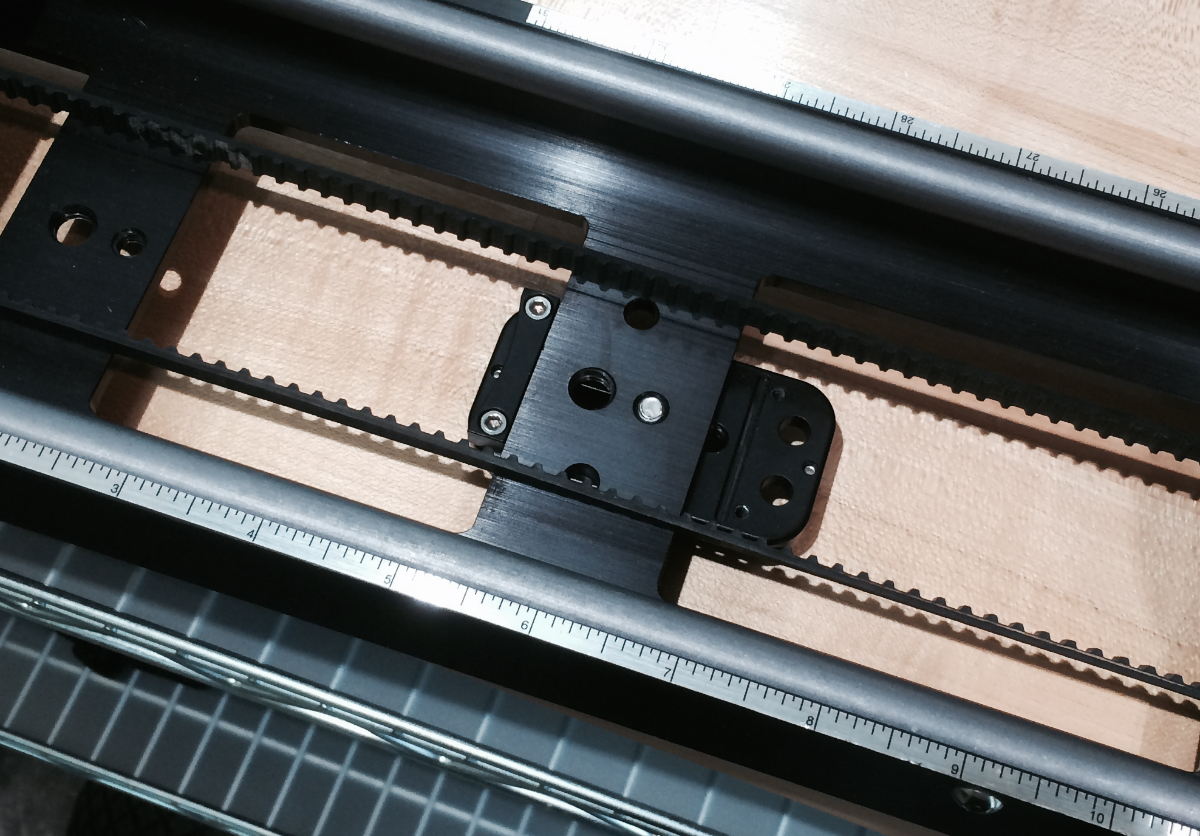
With the two-tripod setup, a half-ball on one side, leveled as the first step, helps greatly with setting the slider. A ballhead on the other end then makes the second tripod support easy to finesse when doing the final leveling. Quick releases are also the way to go. You don’t want to be using screws to attach the slider on every setup. All my sticks and heads are outfitted with Kessler Kwik Releases which take Arca Swiss standard rails.

If you are working with a similar setup I highly recommend getting two Really Right Stuff MPR-73 rails, one for each end of the slider. They come with anti-twist bars which sit flush against the slider’s mounting points. Perfect for no-twist quick release rails and with no need for Loctite, which won’t work with this setup. There’s too much torque to loosen the rails if they only have one mounting point and are set with Loctite.
Pre-Production
The next step was scouting each location in order to determine the best time of day to film and to check each location’s condition. The fewer the surprises the better. Two days were spent scouting with my iPhone as the primary tool. The Sun Seeker app was used to map out sun positions. Artemis Director’s Viewfinder app along with iProLens attachments replicated C300 viewing angles and lens choices on the iPhone.

Camera Kit
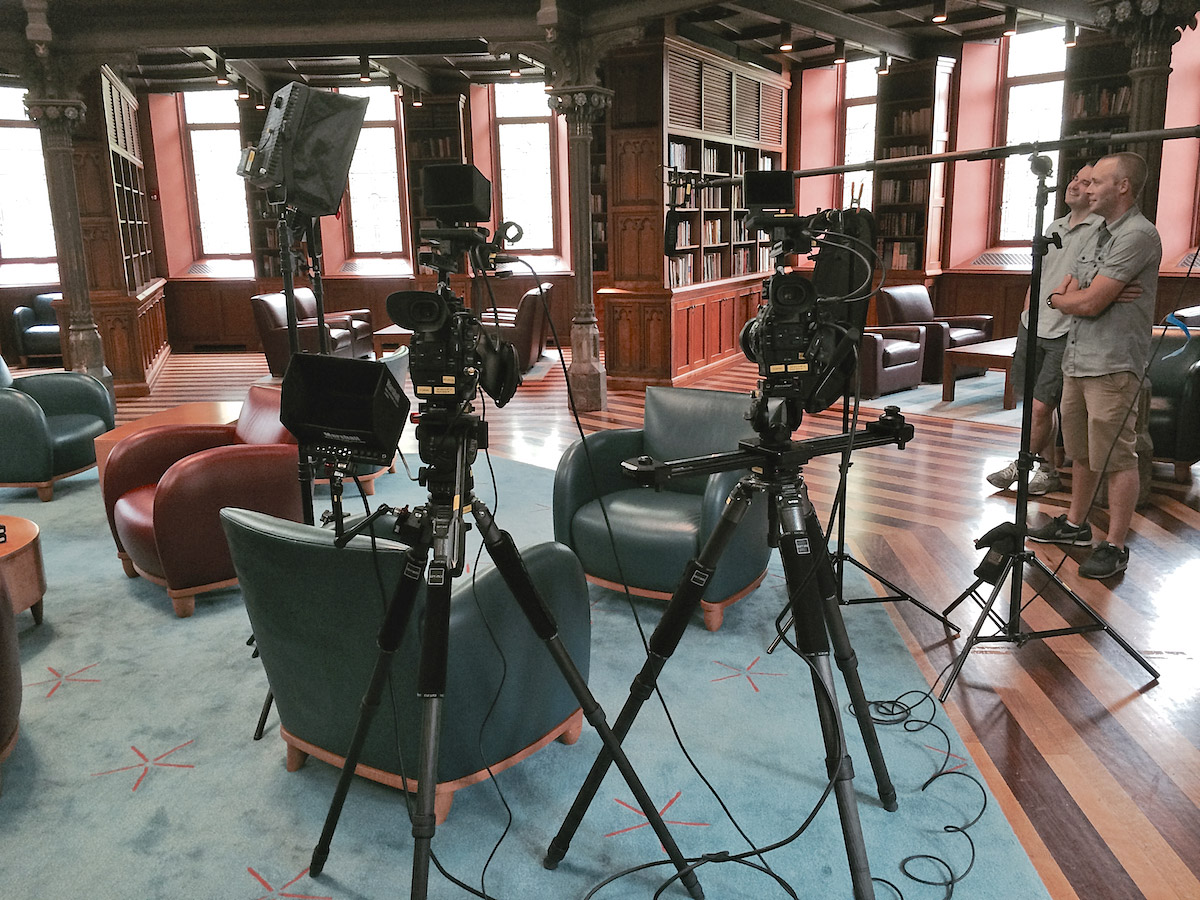
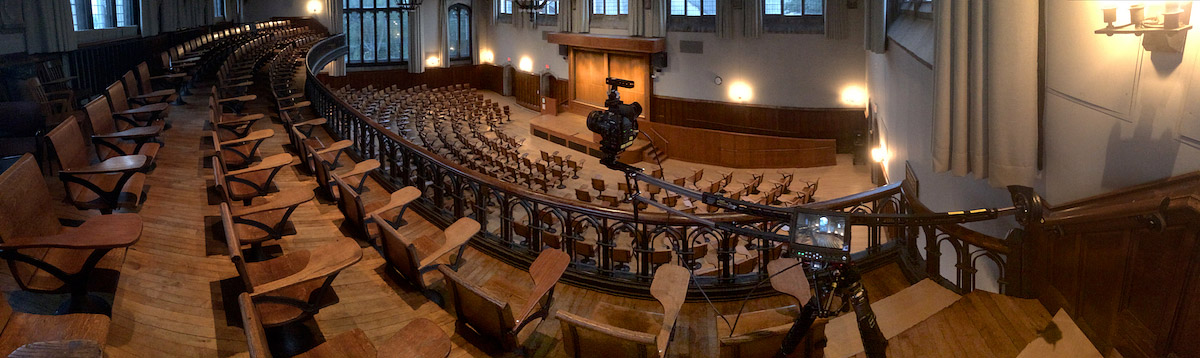
Canon Cinema EOS C300’s were used for the film, two-camera setups for the interviews and single cameras for the architectural work. Only three lenses were used for the latter: Canon’s TS-E 17mm f/4L, TS-E 24mm f/3.5L II, and the 16-35 f/4L IS USM lenses. The TS-E (tilt/shift) lenses offer true perspective correction and superb sharpness. Perfect for architecture. The new 16-35 is also quite sharp and was the go-to lens if a slightly wider, 16mm, view was needed. On the C300 the two tilt/shift lenses are the equivalent of ~25mm and ~36mm in focal length in full-frame 35mm terms. The 16-35 at 16mm is ~24mm.
Given the push-in framework and the 3′ slider some care had to be given to the height of the camera above the slider. Set the camera too low and the slider will be in the shot. A 17mm lens on a Super35 body needs to be ~1′ above the slider so as not to have the slider appear in the frame at the start of the push-in. A high hat + fluid head was used to raise the camera up.
Another piece of kit which came in handy was using a camera handle with a 15mm rod port. It allowed me to mount a french flag via a 1/4″-20 to 15mm adapter – very helpful in avoiding glare on the 17mm TS-E lens which cannot take a lens shade.
Production
Production encompassed ten-days with twenty-seven locations filmed plus the two interviews. My crew was very small, myself and two assistants.
In addition to slider push-ins, tripod and jib shots were filmed. I have a Kessler Pocket Jib Traveler. It’s an incredibly compact and easy to use 6′ jib. The C300 does begin to push the limit on what it can run smoothly but I find that it’s better to have it and do a few takes to get the one than to not have it all. I also recommend using Kessler’s Low Profile Ball Head V2 with it. It gives the flexibility you need to level the camera on the jib and it keeps the camera’s center of gravity as low as possible.
Post-Production
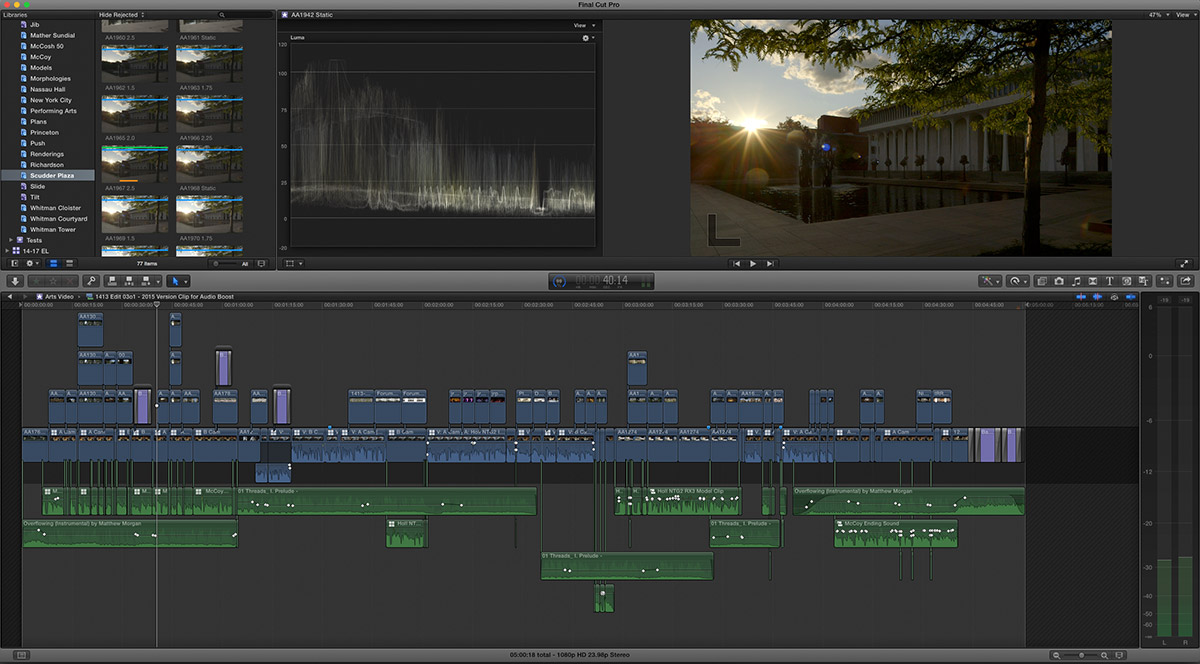
Post was completed over twelve-days. The first few days were spent logging the interviews and keywording the clips. With so many locations, each having multiple views and types of shots, having that as a database within FCPX made it very easy for me to quickly find any clip.
Once again – the final film: