I have written a few posts tied into the Burning Bright project; Tiger, Tiger, The Light Inside, and The Movie Inside. Each of those encompassed candid photography, being a fly on the wall, reacting to the scene in front of me, and not being able to control or direct the action. To walk away from assignments like those having caught a moment, something transcendent or iconic, is very rewarding. But what if you are starting from scratch? A subject arriving at a neutral location where the goal is rise above the location and create an image?
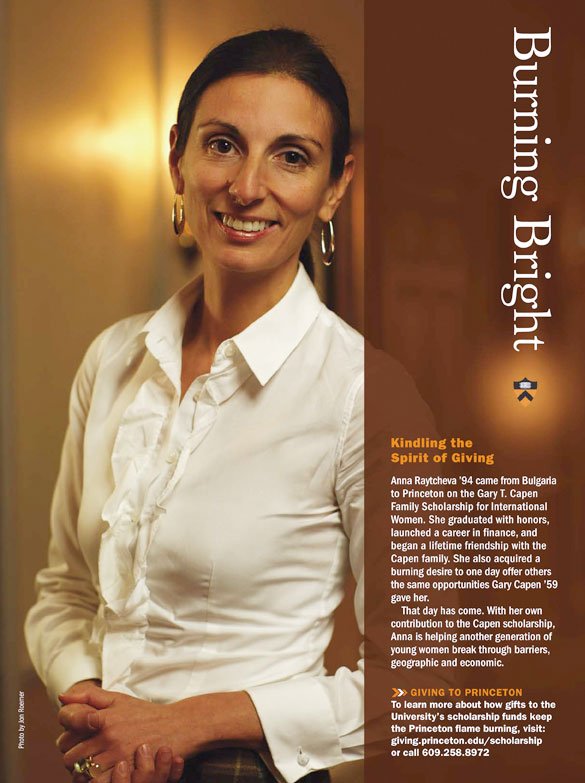
That was the case with the portrait of CitiGroup trader, Anna Raytcheva, a ’94 Princeton grad featured in an April Burning Bright ad. The shoot was in late February and given the weather, timing and logistics we were limited to the ballroom of the New York based Princeton Club. Knowing that I would have to build a portrait, my assistant Chris and I arrived with plenty of time to prepare a few scenarios and plenty of lights to make it happen.
The main setup was to be in the ballroom, a sizable space but limited in detail and mood. The existing lighting was a mix of incandescent faux candles and compact fluorescents in recessed ceiling cans. We had access to the lighting board for the room, killed the compact fluorescents, and set about evening out the incandescents via their dimmers. One wall of the room had some visual interest to play off of – paintings, architectural details, light fixtures, and mirrors. This would be our background.
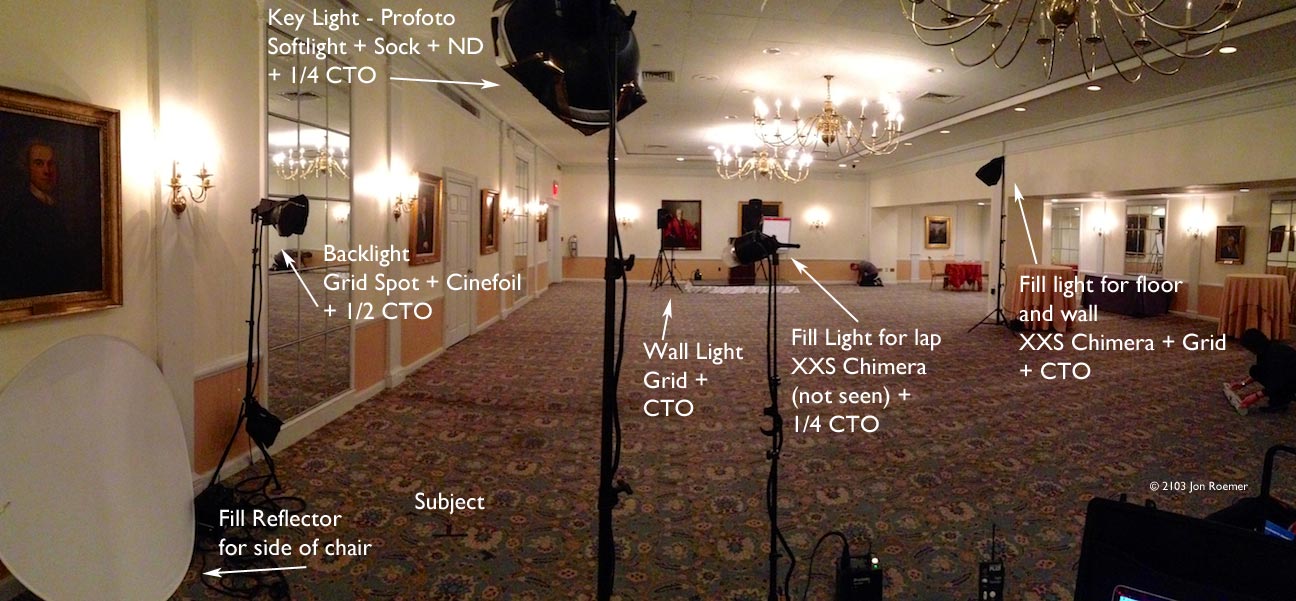
The picture above gives a sense of the room as is plus where my lights were eventually placed. Here’s how we built the portrait:
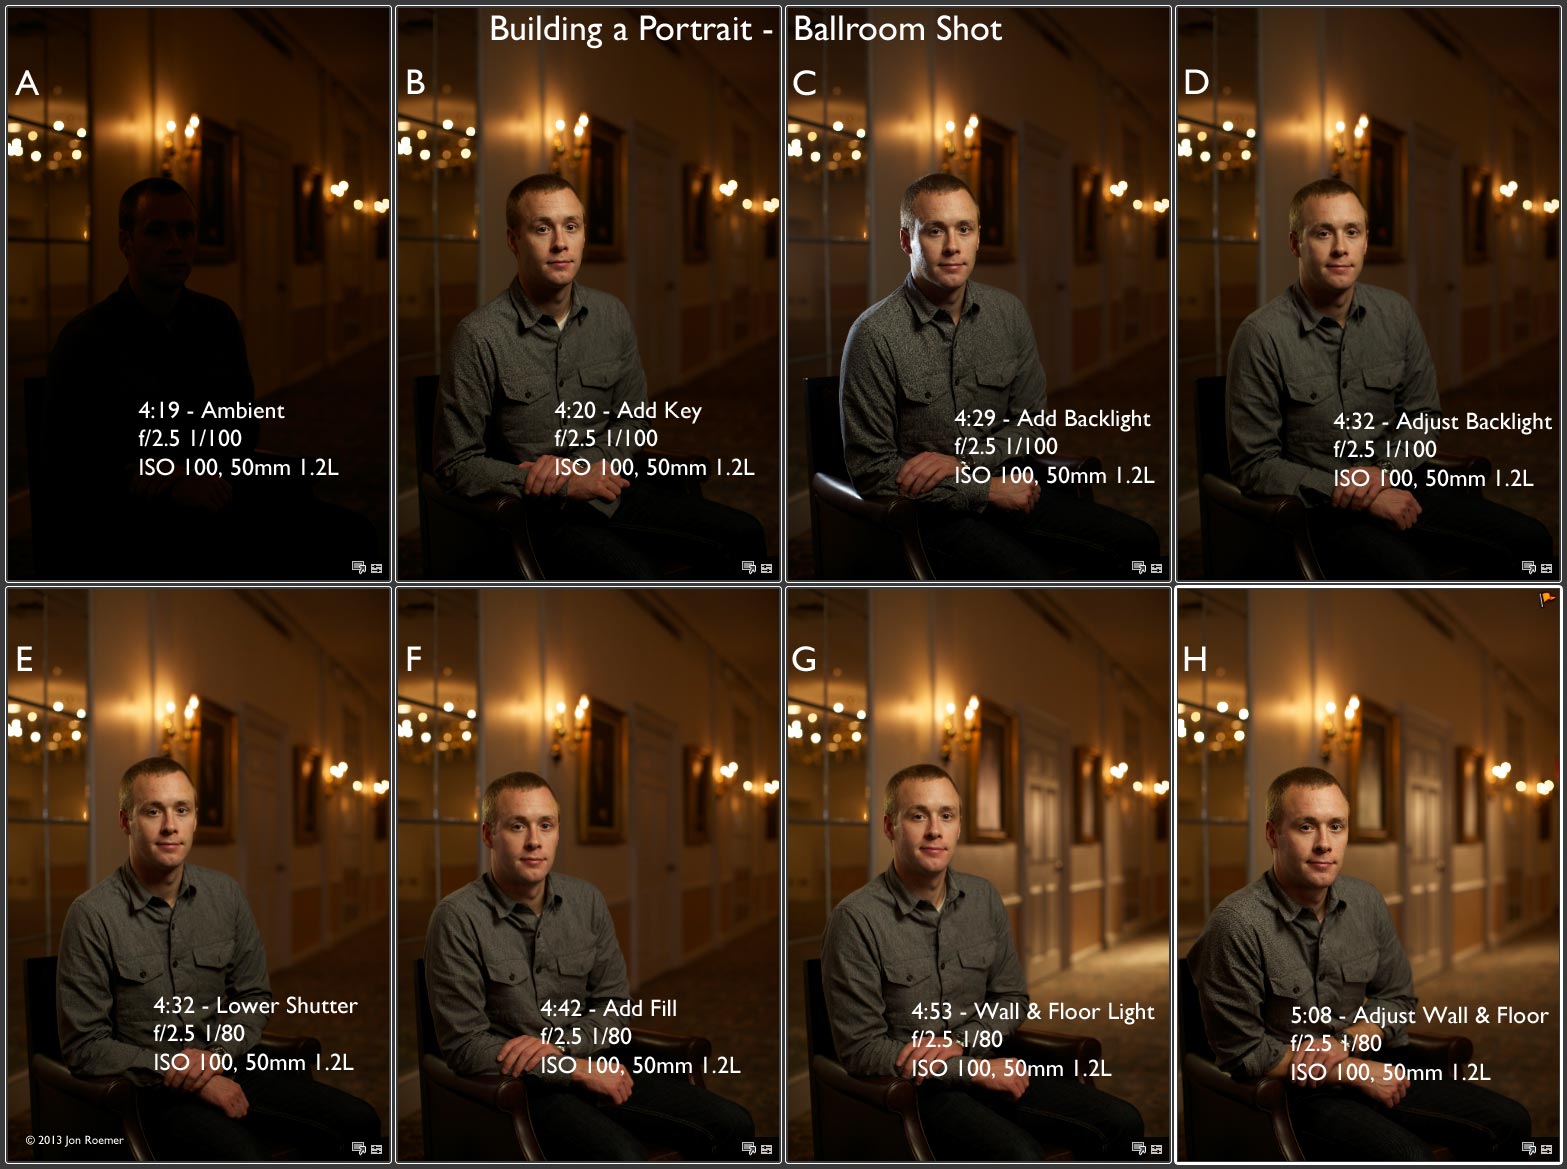
A. Subject unlit, test to get a sense of the ambient light.
B. Added key light, a Profoto Softlight (beauty dish) + sock (cloth diffuser) + ND + 1/4 CTO Gel (warm orange gel.) This is a great start. I can see that by keeping the depth of field shallow I can make this work and possibly not feel like the ballroom it is. Initial decision regarding color balance – the existing incandescent lights are what they are, very warm. I can filter my lights to match them but if I do everything will come out neutral, which is to say not that exciting. So, by filtering the key at 1/4 CTO I am ensuring that the background will stay warm but not go crazy warm and will stay a bit warmer than the subject.
C. Added a backlight, Profoto head + grid spot, but it is too strong.
D. Toned down the backlight. Overall, looking good but image feels a bit dark.
E. Lowered shutter 1/3 of a stop, 1/100 -> 1/80, to let in a bit more ambient and brighten the image. This will remain the exposure for the final images.
F. The chair is feeling a touch dark on camera left, under the armrest as is the subject’s lap and hands. I add a Flexfill reflector to bounce light onto the chair and an XXS Chimera soft box + 1/4 CTO to fill in the subject’s lap and hands.
G. F was feeling better but the background is still too boring and too dark. The subject feels as if they are not part of the room. I add another XXS Chimera with fabric grid on camera right but midway back into the room. This adds fill to the floor and the door + wall. I also add a light + grid spot on the far back side of the room pointed toward and raking across the door + wall. This creates some texture and helps link the subject to the room. Both lights added here are filtered with a full CTO to match the room lights, making them feel natural to the environment.
Good first stab on these two added lights but the wall light is too bright. It draws the eye away from the subject.
H. I balance out the two lights added in G and we are ready for the subject.
The time codes for A – H are in the grid above. They give a sense of the time spent to create the setup. Take it with a grain of salt. Within this same time we created a second setup in the stairwell adjacent to the ballroom and we created two variations of the ballroom setup (one for standing and one adding a cloth ID banner.)
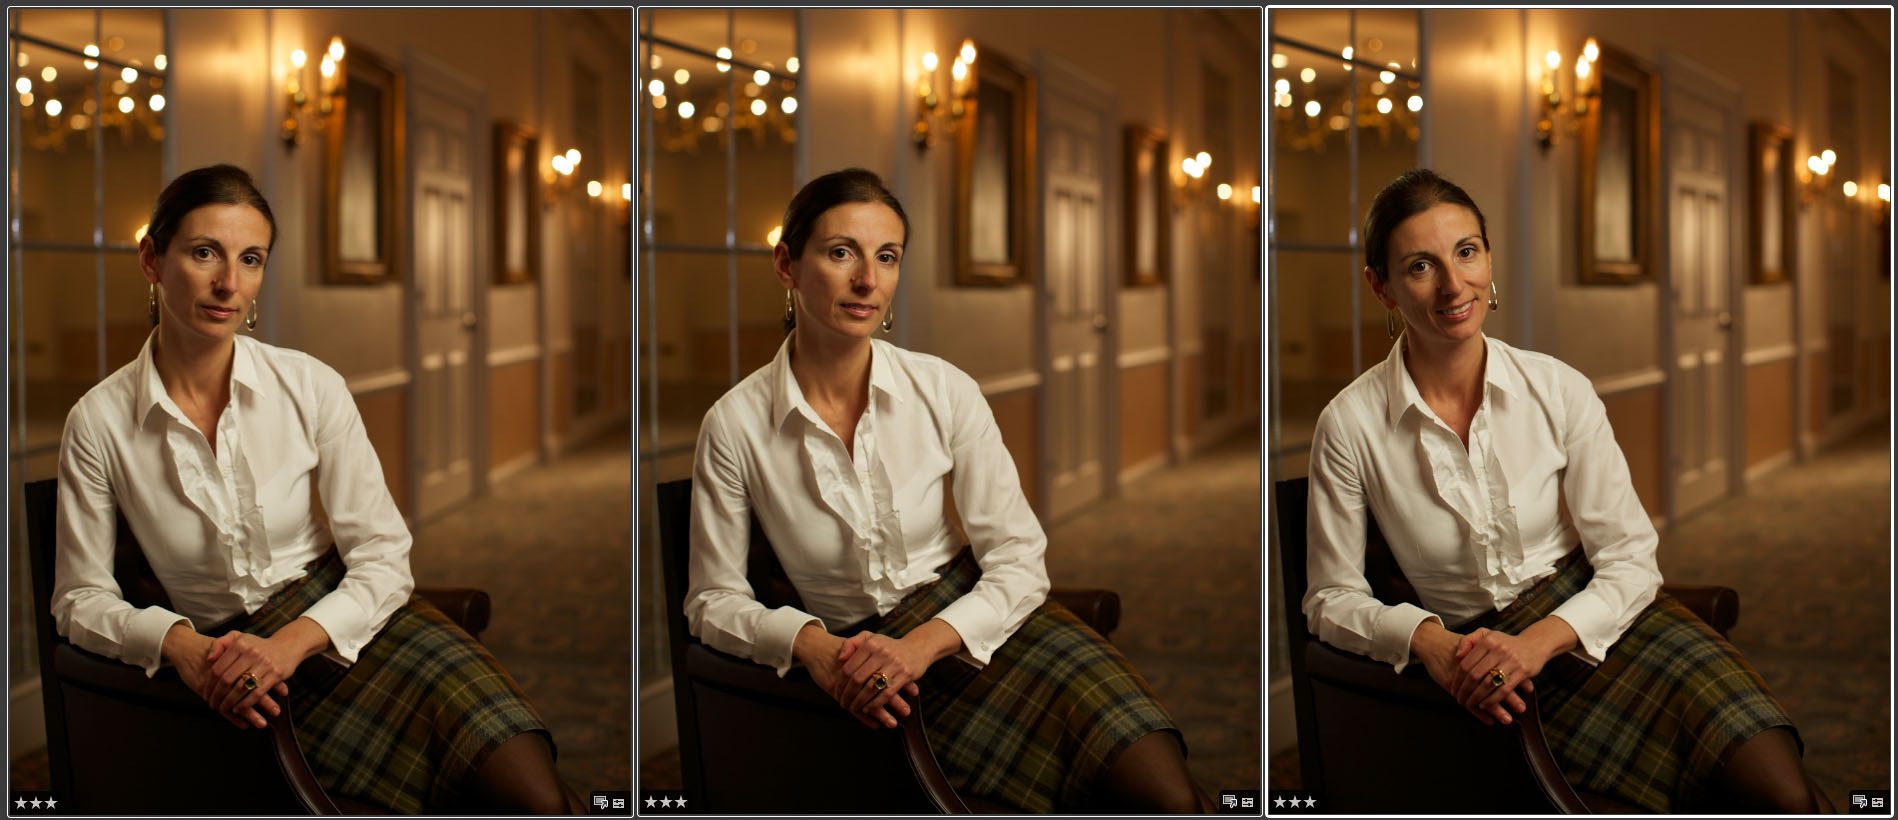
Above are three seated poses of the subject, Anna. I love how the light falls on her and the backlight is rocking, adding a great highlight to her neck and jaw line. These images are unedited, only a custom white balance set in Aperture, so they give a direct sense of the lighting.
I opted to keep the white balance on the warmer side rather than completely neutralizing the 1/4 CTOs lighting the subject.
In the end a standing image best fit the layout and that was used in the final ad.

Side note:
On these assignments I always shoot tethered to a laptop. It gives me a bigger image to review, the assistant can check focus while I shoot, and the client can see what I am getting. In the past, the laptop was like a Polaroid from days of old. Never quite there image wise, it was a compromise which required that the client trust that the final image would improve upon what they were seeing. It was also prone to throw a photographer off since the image color and tone would vary depending upon one’s angle to the screen. That is not the case with the new MacBook Pro Retina. I picked one up this past January when it was last updated. It is hands down the best laptop I have ever used. I know I can trust what I am seeing on the screen; contrast, color, and tone are all there. There are no viewing angle issues. I can see the difference between a 1/8 CTO and 1/4 CTO added to a light.
The new MacBook Pro Retina makes lighting and evaluating a setup so much easier.