Canon C300 footage requires that it remain in the same folder structure as the CompactFlash cards it was recorded on in order for it to be accessible to NLEs. You can work right off of a CF card but you are best served backing up the card first so that you have something to work with down the line (and then backing that up as well.)
You cannot copy the individual movie clips off of the card to use them. You cannot use OS X’s Disk Utility to create a disk image of the CF card.

Canon provides a free program, XF Utility, which will allow you to backup a CF card from the C300. FCP X also has a built in archive option which works similarly. Of course, none of the terminology is the same between XF Utility or FCP X and the information provided along with the clips varies from non-existent to full featured. To cut through the jumble here’s a quick guide:
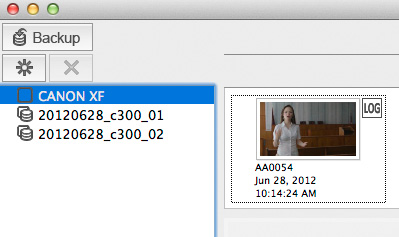
XF Utility will allow you to backup CF cards via its Backup button. You can select where the media is saved but you must do it first via the XF Utility Preferences. The media is named automatically with the backup date. You can rename it once the backup is created. In XF Utility’s parlance backed up media is now virtual media.
To confuse things, XF Utility will allow you to backup selected clips via button called Create Virtual Media. The difference here is -> CVM backs up select files, Backup backs up an entire CF card. Once either is created, CVM or Backup, it’s all called Virtual Media in XF Utility.
One note: do not right click and select Delete Virtual Media or hit the X button. This deletes the copies immediately with no warning and no confirmation window.

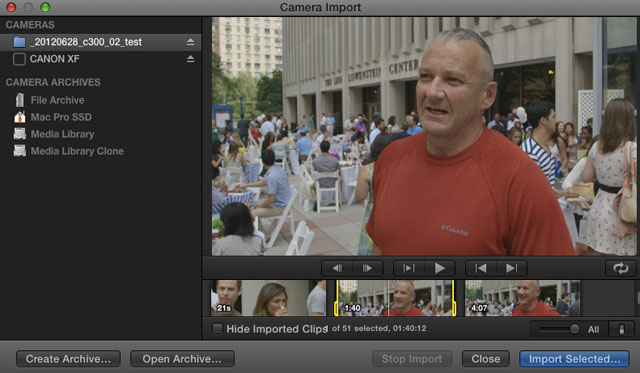
FCP X via its Camera Import module can read a CF card from the C300 (assuming you have installed Canon’s XF plug-in.) It can also create a backup which it calls an Archive. You do this when your media is mounted and listed under Cameras in the upper left. Select it and hit Create Archive on the bottom left.
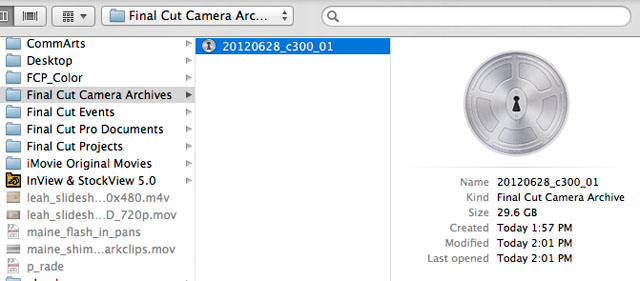
FCP X does allow you to pick the hard drive where you store the archive but you cannot select the folder. The archive gets placed in a Final Cut Camera Archives folder at the root level. FCP X also encapsulates the archive within an OS X package structure. You can always get at it manually by right clicking the icon and selecting “show package contents.” You can also move the archive to another location once it is created.

Both methods work in terms of backing up your CF cards from the C300 and keeping the C300’s folder structure intact. The advantage to the XF Utility workflow is that all of the metadata created in the camera is always accessible when viewed within XF Utility (e.g. f-stop, shutter, WB, lens, focal length, ISO, frame rate, size, etc.)
The FCP X backup workflow is convenient in terms of staying within FCP X, it feels a bit more solid in terms of how it functions, but it will require a few more steps if you want to re-open the footage in XF Utility to view the metadata. In order to do so you have to select the FC Camera Archive, as shown above, right-click to view package contents, copy the “Contents” folder into a new folder, open XF Utility and via its *Set Virtual Media command navigate to and select the new folder.
The complete XF Utility -> FCP X ingest workflow is covered well in a blog post by AbelCine.
*Set Virtual Media is the command to use to get XF Utility to re-recognize C300 media (if it was backed up by a third-party program [like FCP X, above] or if the name of the folder was changed after backing up with XF Utility.)
—
Update – 7/09/12: Corrected information about Final Cut Camera Archive and re-opening into XF Utility to view C300 metadata.
Update – 7/12/12: Added note about Set Virtual Media command.